



The Scrollnav widget from Wow Elements allows you to create a smooth and interactive navigation system for single-page or long-scroll websites. It enables users to quickly jump to different sections of a page with a stylish navigation menu, improving usability and overall browsing experience. With flexible positioning, styling, and customization options, you can easily align the ScrollNav with your website’s design and structure. In this documentation, we will guide you through how to use and customize the ScrollNav widget.
Enable The Scrollnav Widget #
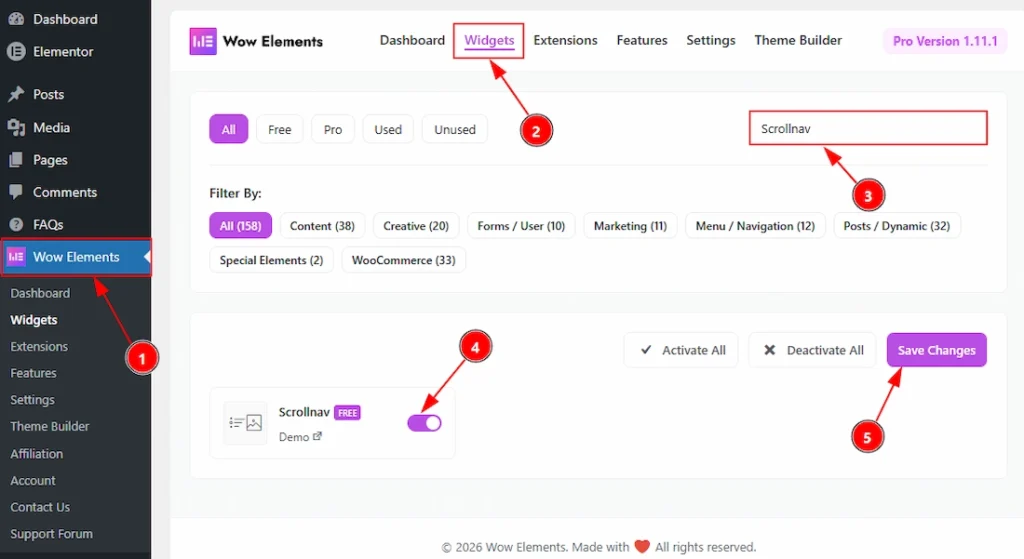
To use the Scrollnav widget from Wow Elements, first, you have to enable the widget.
- Go to WordPress dashboard → Wow Elements Plugin dashboard.
- Then, Click the Core Widgets Tab.
- Search the Scrollnav Widget Name.
- Enable the Scrollnav Widget.
- Hit the Save Settings Button.
Inserting The Scrollnav Widget #
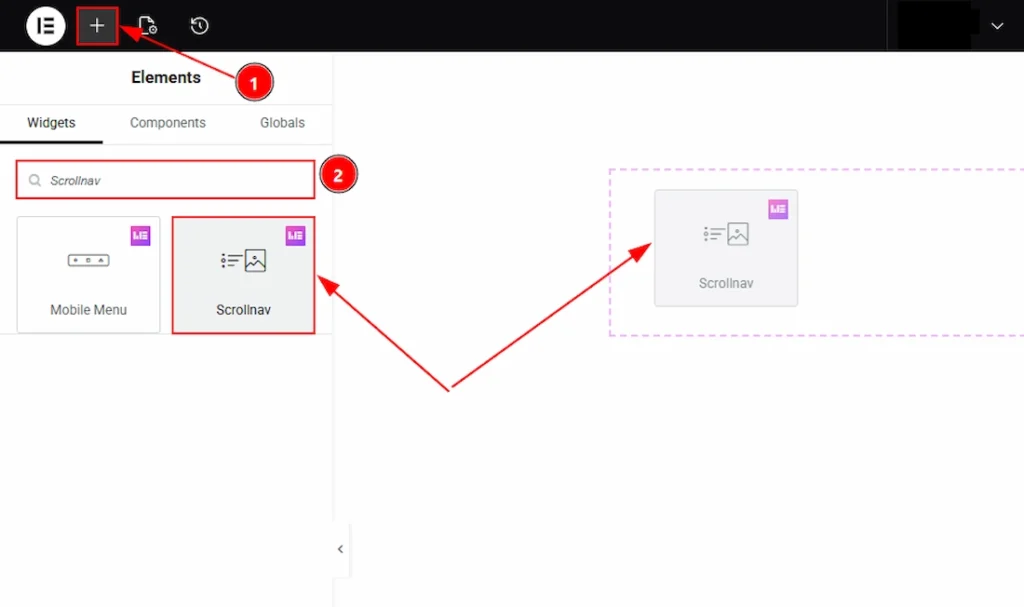
1. Go to the Elementor Editor Page and hit the “+” icon Button.
2. Search the Scrollnav name.
3. Drag the widget and drop it on the editor page.
Content Tab Overview #
Scrollnav Section #
Go to Content → Scrollnav
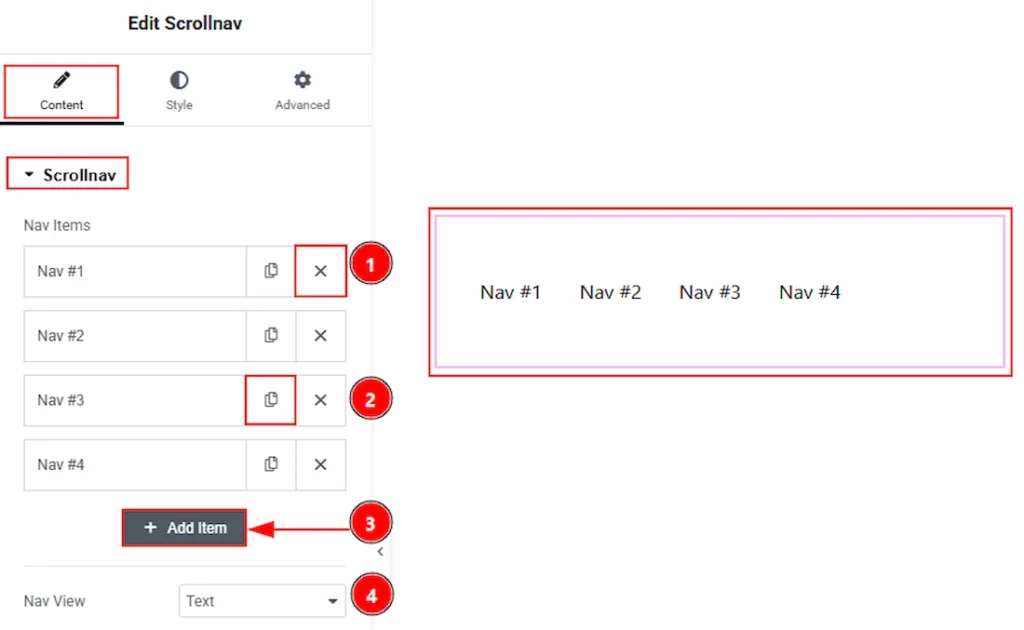
1. Close Item: You can click on this close icon to close the scrollnav item.
2. Copy Item: You can click on the copy icon to duplicate the scrollnav item.
3. Add Item: You can click on this button to add more scrollnav items.
4. Nav View: You can choose the nav item view to text or dot with this option.
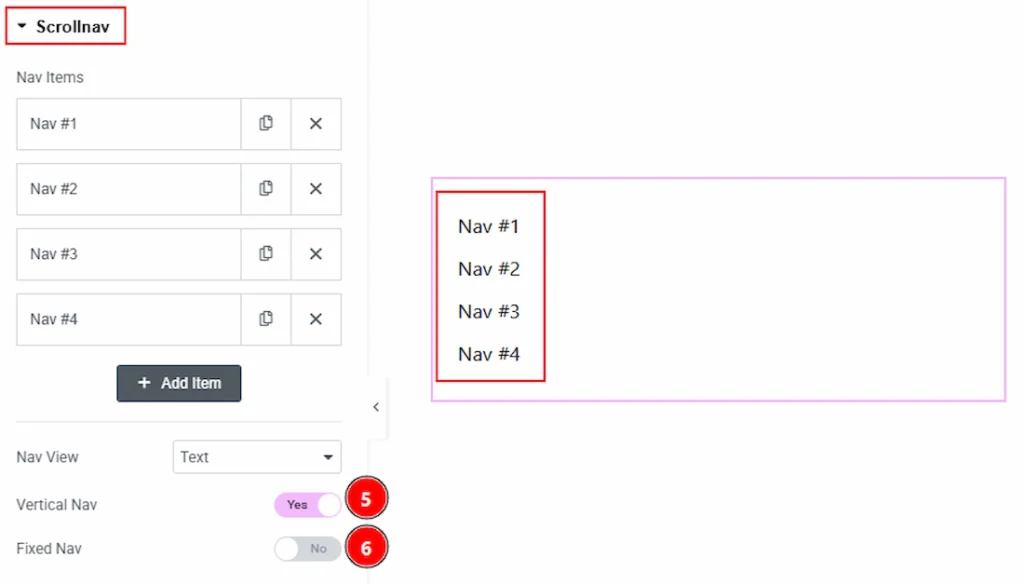
5. Vertical Nav: Enable the switcher to make the scrollnav items vertical with this option.
6. Fixed Nav: Enable the switcher to fix the scrollnav position with this option.
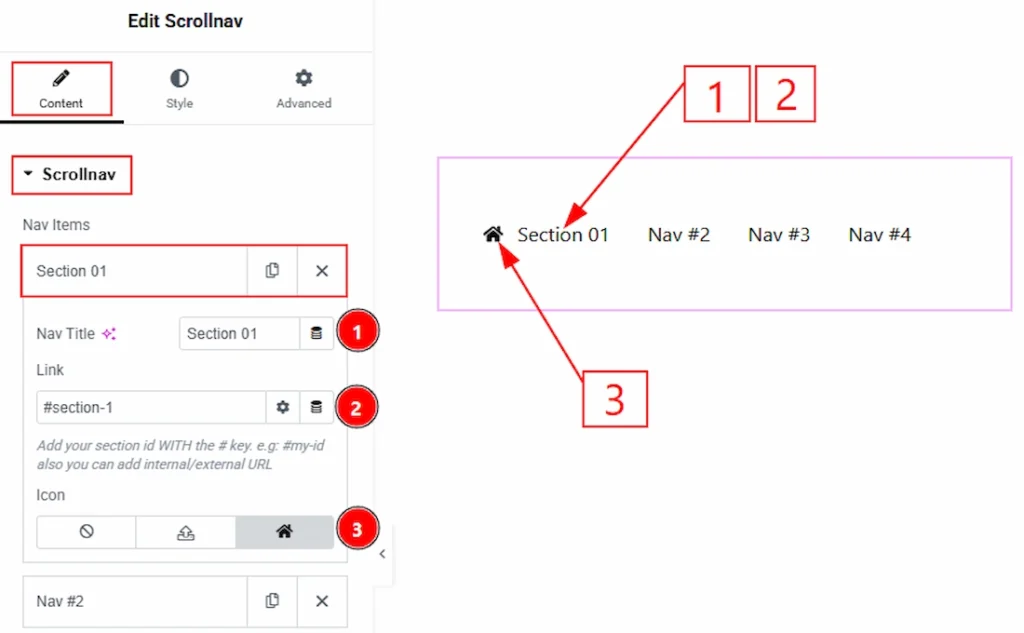
In each scrollnav item, we have options to customize the nav items. Let’s start describing those options –
1. Nav Title: You can make changes to the nav title with this option.
2. Link: This is the field where you can add the section id with # key to connect with sections.
3. Icon: You can add an icon to the nav items with this option.
Set Up CSS ID to Section #
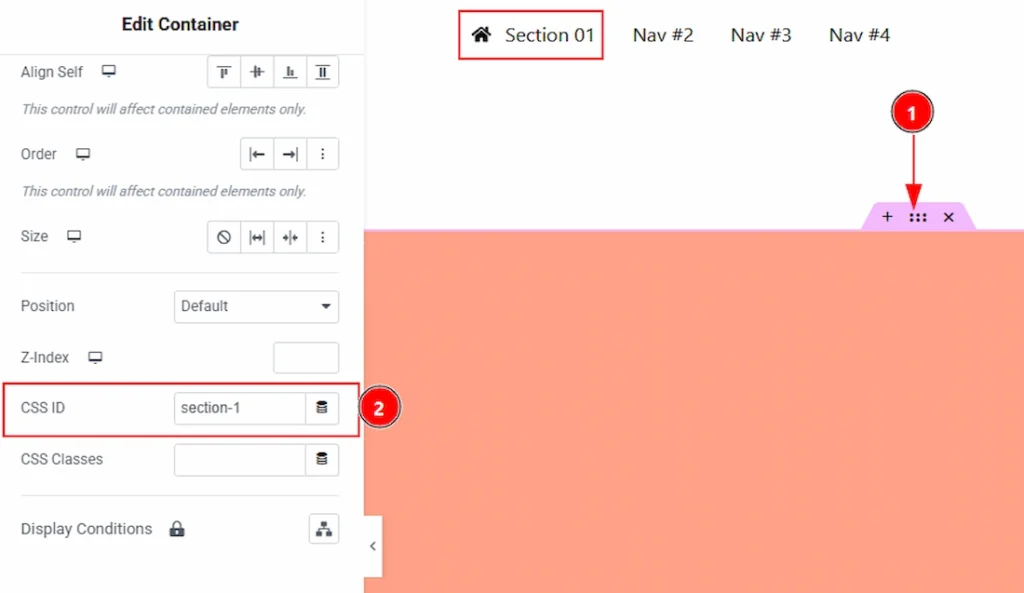
To connect the section with the Scrollnav, you need to add the CSS ID to the container/section. For this, you need to select the section/container and then go to the Advanced Tab > CSS ID and input the ID here that you used with the # key on the link field. You don’t need to add the # key here.
Additional Options Section #
Go to Content → Additional Options
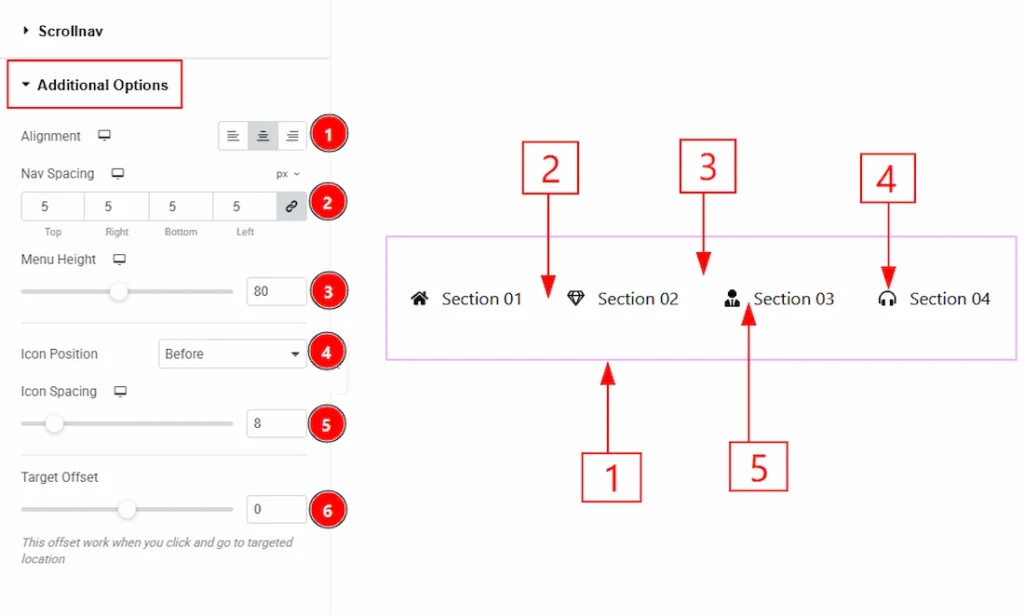
1. Alignment: You can adjust the position of the scrollnav items with this option.
2. Nav Spacing: You can adjust the space between the nav items with this option.
3. Menu Height: This option allows you to adjust the height of the scrollnav menu items.
4. Icon Position: You can set the position of the icons to before the text or after the text with this option.
5. Icon Spacing: You can adjust the space between the icon and the scrollnav menu items’ text with this option.
6. Target Offset: You can adjust the offset value here, which will work when you click and go to the targeted location.
Style Tab Overview #
Default Nav Section #
Go to Style → Default Nav
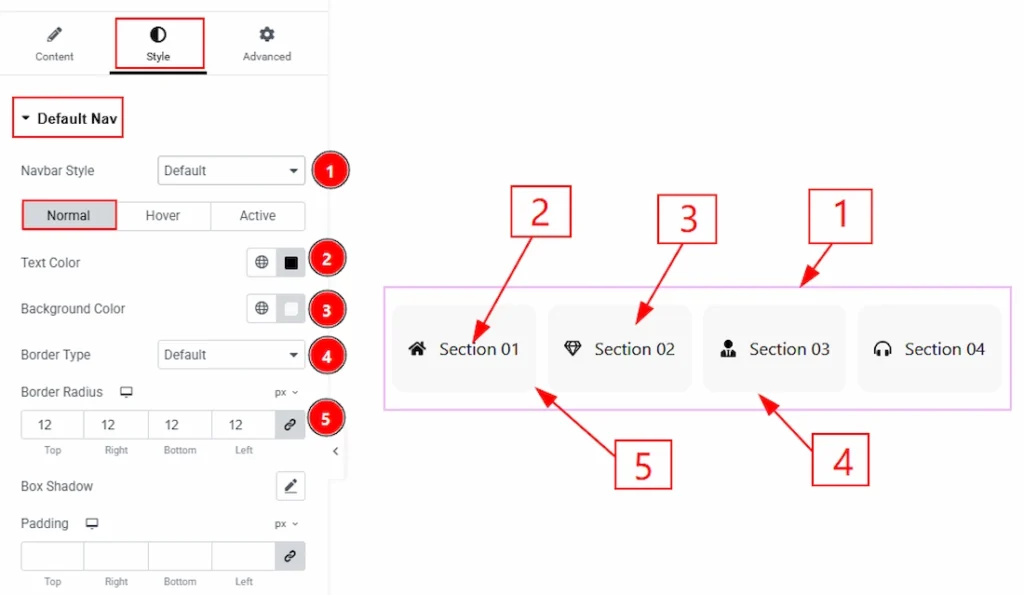
1. Navbar Style: You can choose the style of the scrollnav menu items with this option.
In this section, we have three more tabs. These are Normal, Hover & Active. Let’s start with the Normal tab –
2. Text Color: You can change the nav menu items’ text color with this option.
3. Background Color: You can change the background color with this option.
4. Border Type: You can add and change the border types with this option.
5. Border Radius: You can control the roundness of the border with this option.
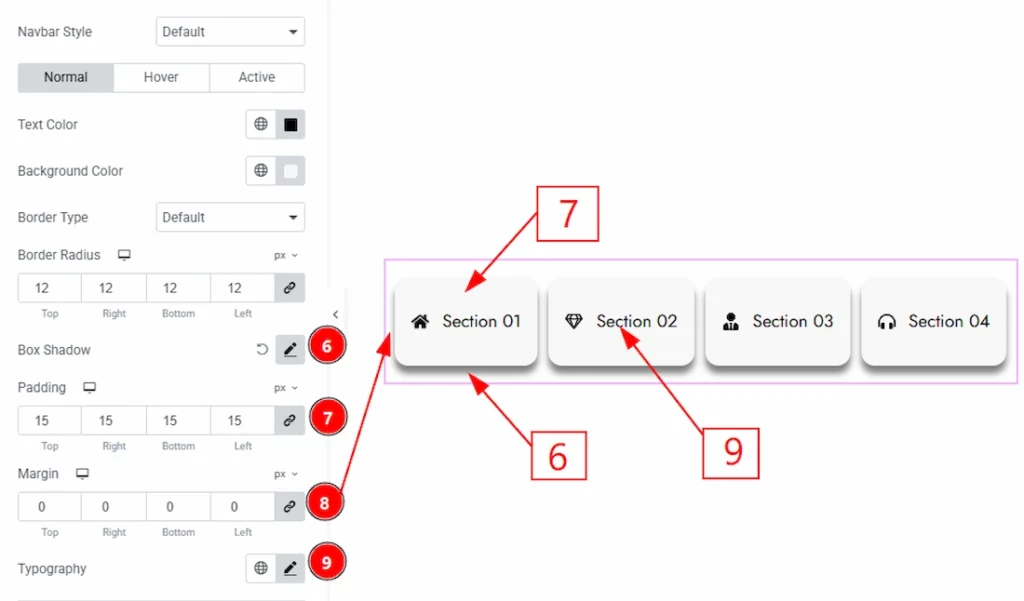
6. Box Shadow: You can add a shadow effect to the menu items field with this option.
7. Padding: You can adjust the inner space of the scrollnav menu items with this option.
8. Margin: You can adjust the space around the scrollnav menu items with this option.
9. Typography: Change the font family, size, weight, transform, style, decoration, line height, letter spacing, and word spacing from here.
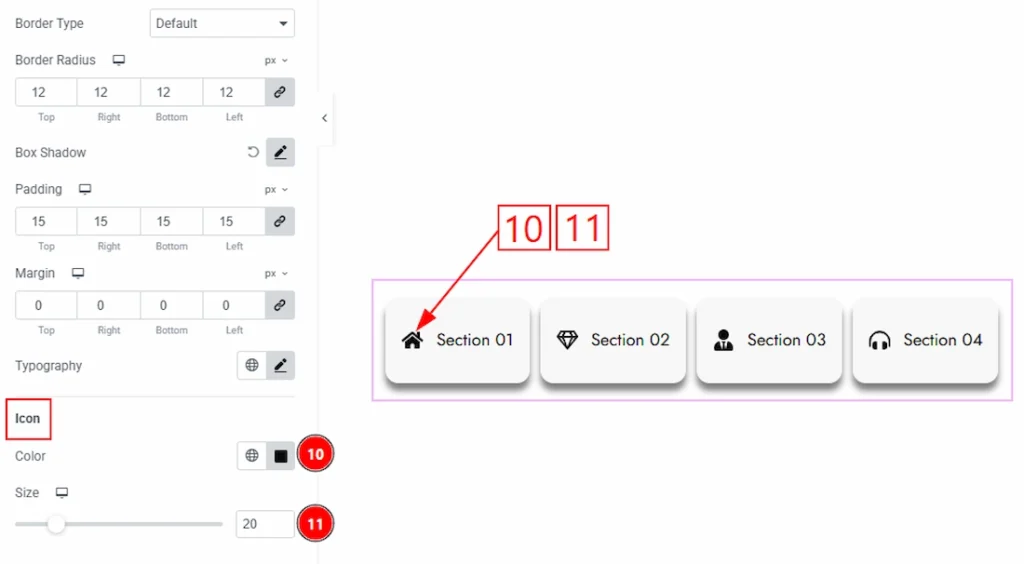
10. Color: You can make changes to the icon color with this option.
11. Size: You can adjust the size of the icon with this option.
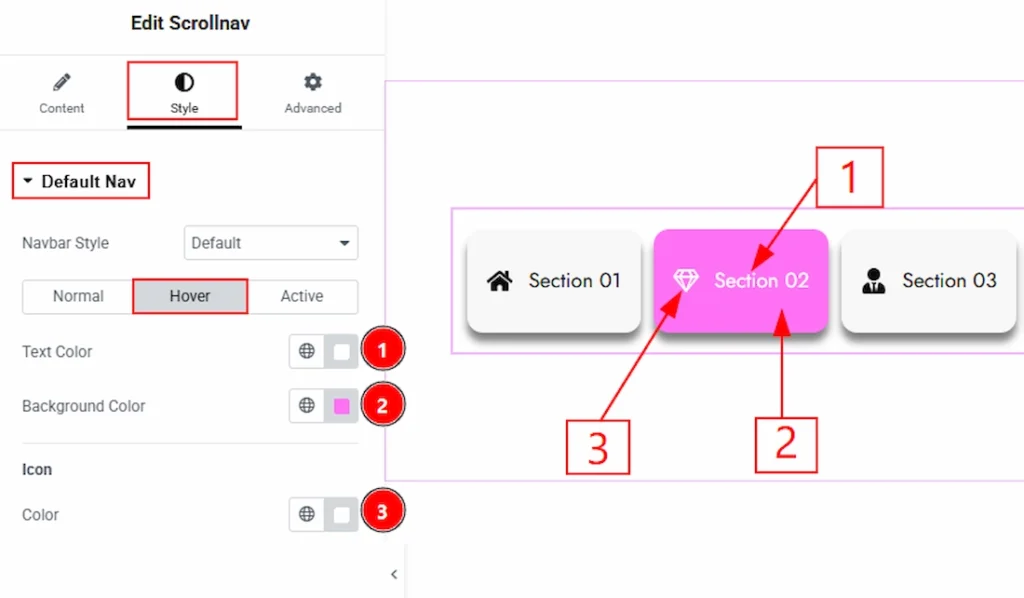
Now let’s proceed to the Hover Tab –
1. Text Color: You can change the scrollnav menu items’ text hover color with this option.
2. Background Color: You can make changes to the background hover color with this option.
3. Icon Color: You can make changes to the icon hover color with this option.
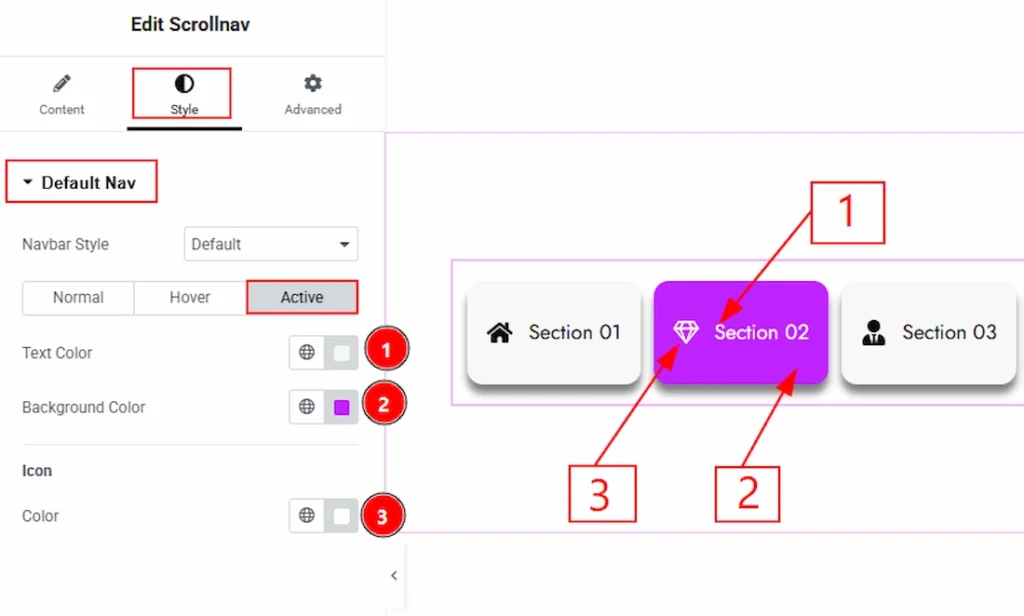
Now let’s proceed to the Active Tab –
1. Text Color: You can make changes to the scrollnav menu items’ active color with this option.
2. Background Color: You can make changes to the active background color with this option.
3. Icon Color: You can change the icon’s active color with this option.
All done! You have successfully customized the Scrollnav on your website.
Video Assist #
You can also watch the video tutorial to learn more about the Scrollnav. Please visit the demo page for examples.
Thanks for being with us.