


The AdBlock Detector Extension in Wow Elements Pro allows you to detect whether visitors are using ad blockers on your website without any coding. It helps you display custom messages, warnings, or alternative content to users with active ad blockers, improving communication and user engagement. With flexible customization controls and easy configuration options, you can manage how your website responds to ad-blocking users effectively. In this documentation, we will guide you through how to use and customize the AdBlock Detector Extension in Wow Elements Pro.
Setting Up The AdBlock Detector Extension of Browser #

For using the AdBlock Extension you need to activate it to your browser first. If you have already added the extension to your browser then you don’t need to do anything but if you haven’t then go to your browser and then search for the AdGuard AdBlocker Extension and click on the Add to Chrome.
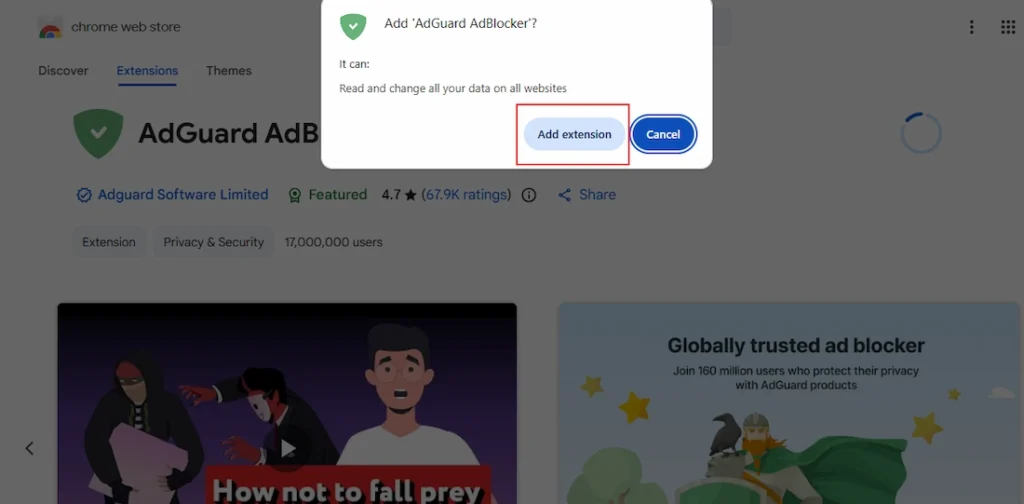
After clicked on the the Add to chrome button a new popup will appear to take your confirmation. You need to click to the add extension button to continue the process of adding the extension to your browser.
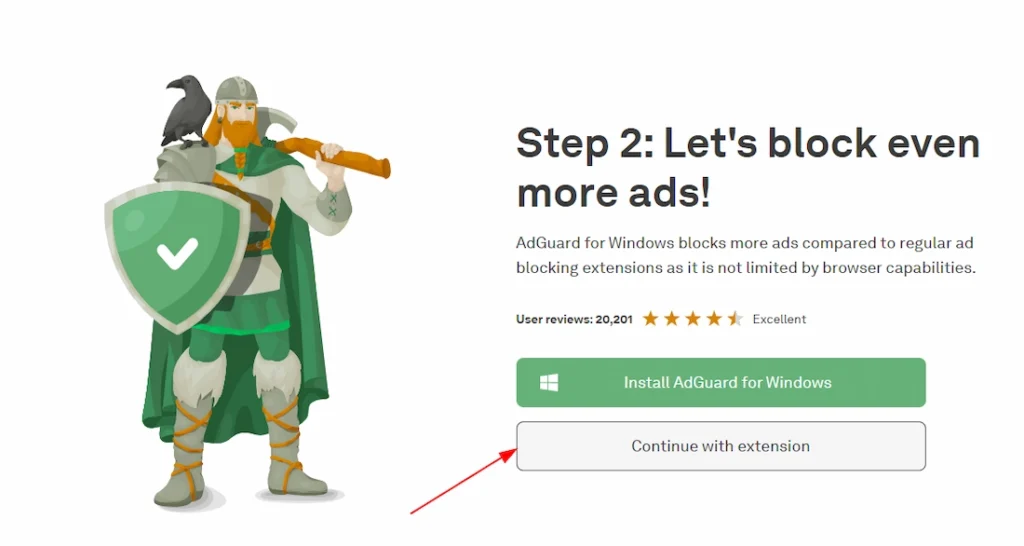
After that a new dashboard will appear to ask the permission for continue with extension of install AdGuard to your local. You can click on the continue with extension button.
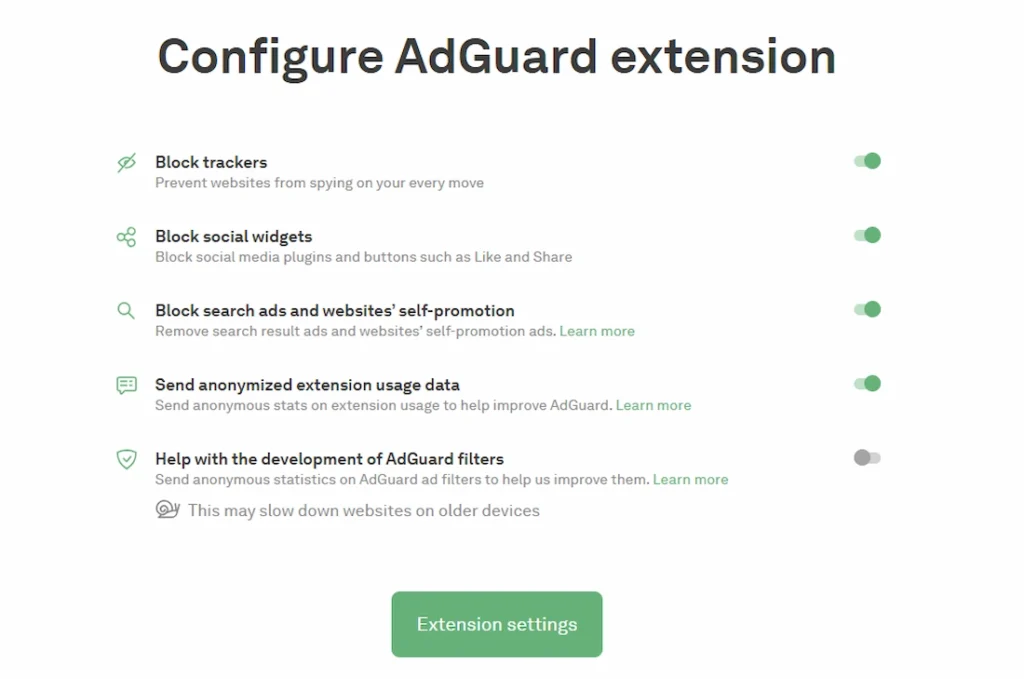
In the last stage, you will see the settings to configure AdGuard Extension, Make changes as per your preference.
Enabling the AdBlock Detector Extension #
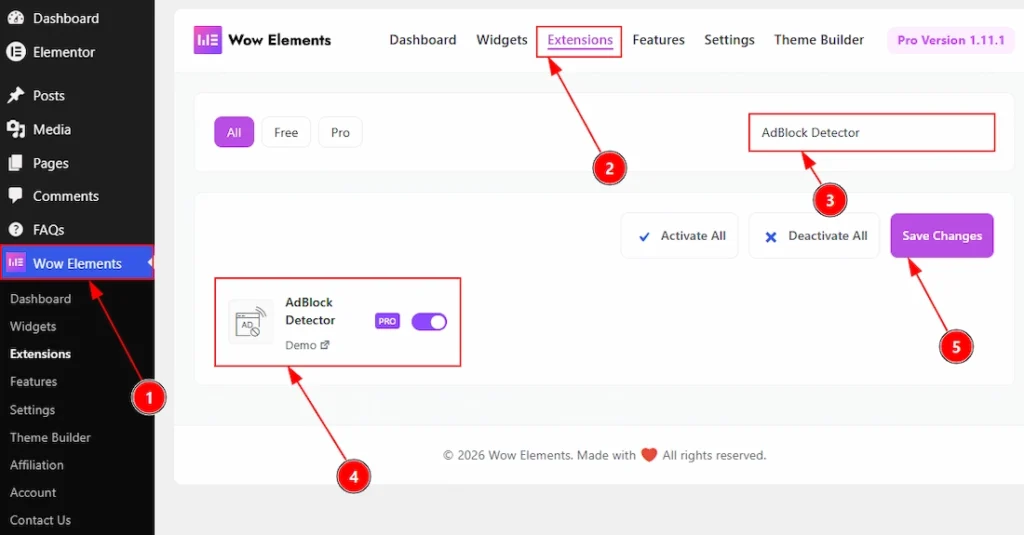
To use the AdBlock Detector Extension from Wow Elements Pro, first, you have to enable the extension.
- Go to WordPress dashboard → Wow Elements Plugin dashboard.
- Then, Click the Extension Tab.
- Search the AdBlock Detector Extension Name.
- Enable the AdBlock Detector Extension.
- Hit the Save Settings Button
Where To Find The AdBlock Detector Extension #
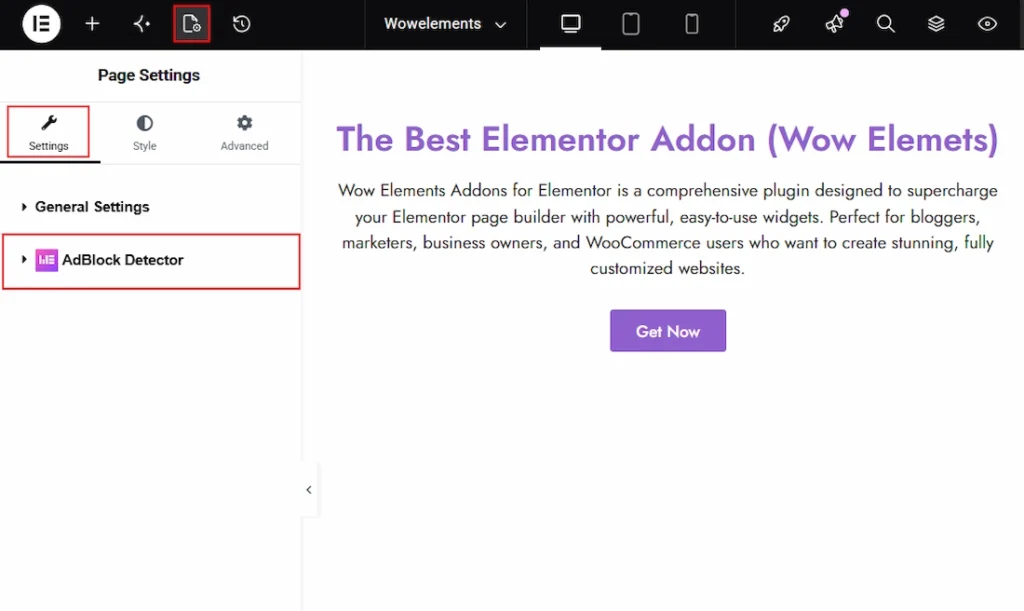
You need to go to the Page first where you want to add the extension. Navigate to WP Dashboard > Pages > Select the Page you want > Edit Page with Elementor. After the page opens, then follow the below steps –
1. Click on the Page Settings icon on Elementor Editor Page.
2. Now click on the settings tab.
3. Here, below the General Settings, you will find the AdBlock Detector Extension tab.
Configuring the AdBlock Detector Extension #
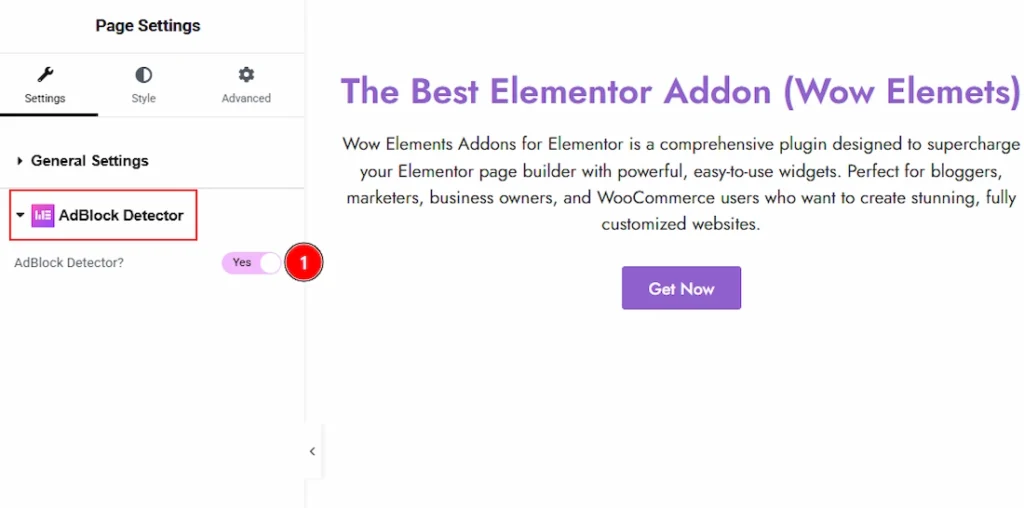
This is a very simple task. If you have followed the upper steps then you don’t need to do anything else. Just open the AdBlock Detector tab and –
1. AdBlock Detector? : Enable the switcher to add the extension to the page.
Final Preview of The AdBlock Detector Extension #
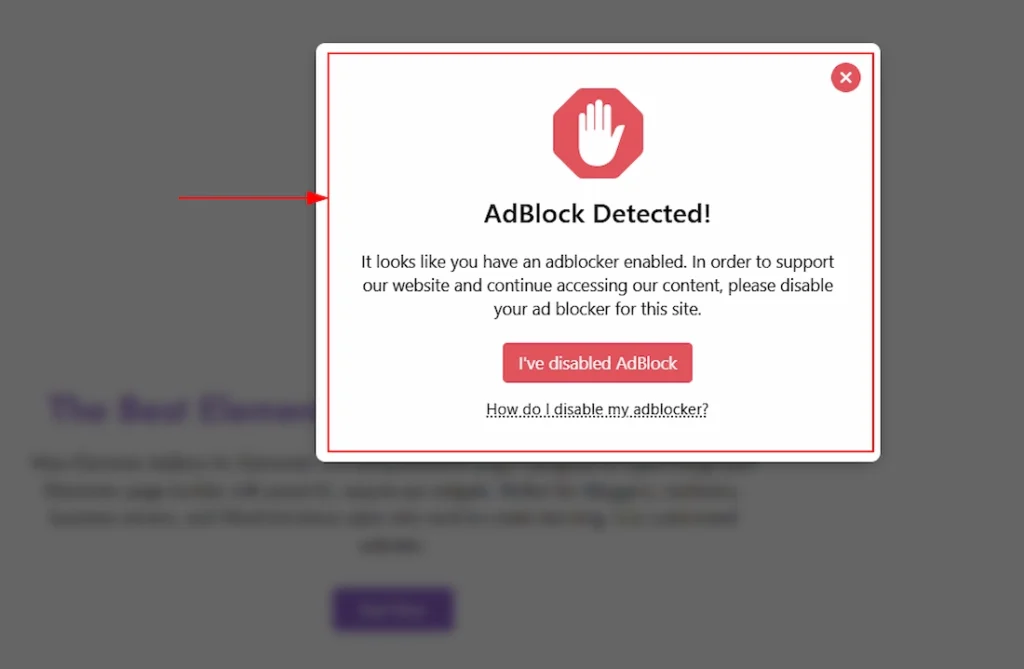
After enable the extension, publish the page and preview it. When the page will load, a popup will appear to inform you to disable the extension in browser. Disable the extension and then you can access to the page.
All done, You have successfully customised the AdBlock Detector Extension on your website.
Video Assist #
You can also watch the tutorial video about the AdBlock Detector Extension. Please visit the demo page for examples.
Thanks for staying with us.