



The Confetti Effects feature in Wow Elements allows you to add eye-catching animated confetti effects to your website sections, buttons, or elements. It helps create a more interactive and engaging user experience by adding celebratory visual effects for promotions, achievements, special events, or call-to-action areas without any coding. With flexible customization and styling options, you can easily control the appearance and behavior of the confetti animation to match your website design. This documentation will guide you through how to use and customize the Confetti Effects feature in Wow Elements.
Enable the Confetti Effects Extension #
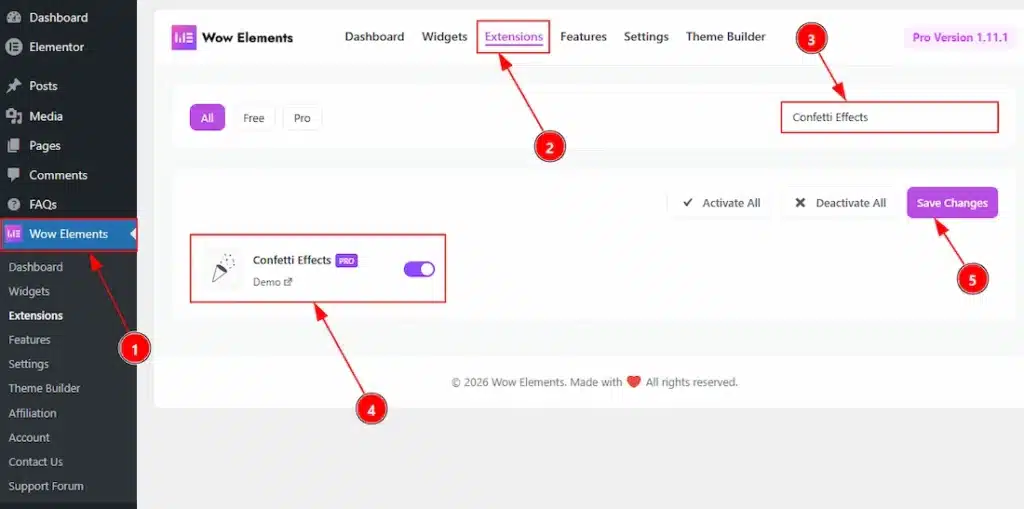
To use the Confetti Effects extension by Wow Elements Pro, first, you have to enable the extension.
- Go to WordPress Dashboard → Wow Elements Plugin dashboard.
- Then Click the Extensions Tab.
- Search the Confetti Effects Extension Name.
- Enable the Confetti Effects Extension.
- Hit the Save Settings Button.
Where to Find the Confetti Effects Extension #
To start with the feature, let’s first take an existing design or widget inside the page. This is for a better understanding of the functions of this feature. You can work with the confetti effect on any elements. However, you can still activate the Confetti Effects on a blank section, too.
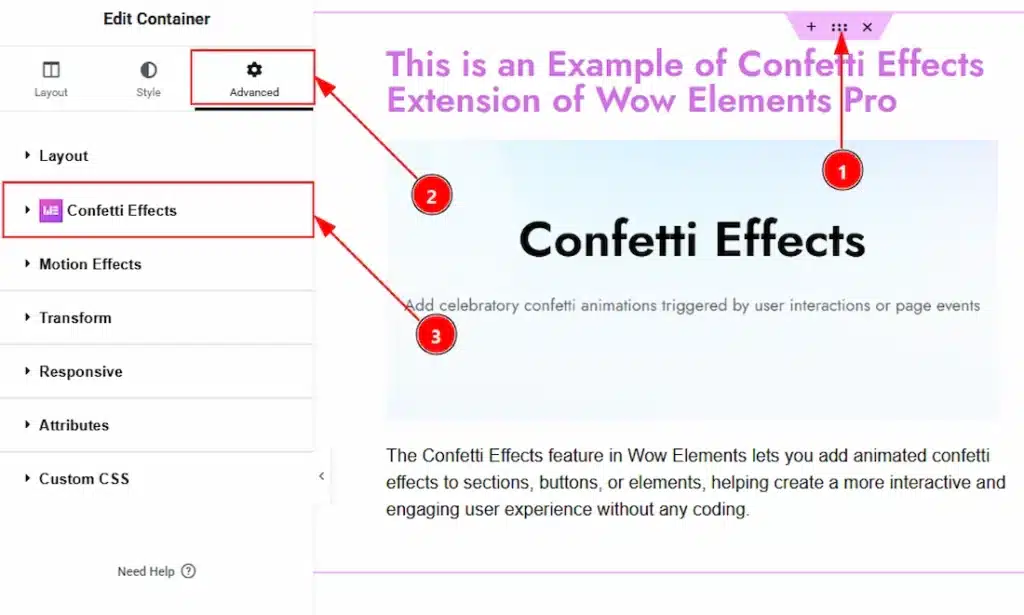
To get the Confetti Effects extension, you must need to select any element, that can be widget, section or any container. Follow the below steps –
- Select any widget/section where you want to use the Confetti Effects extension.
- Go to Advanced Tab of the selected element.
- Navigate to the Confetti Effects section.
How to Customize the Confetti Effects Extension #
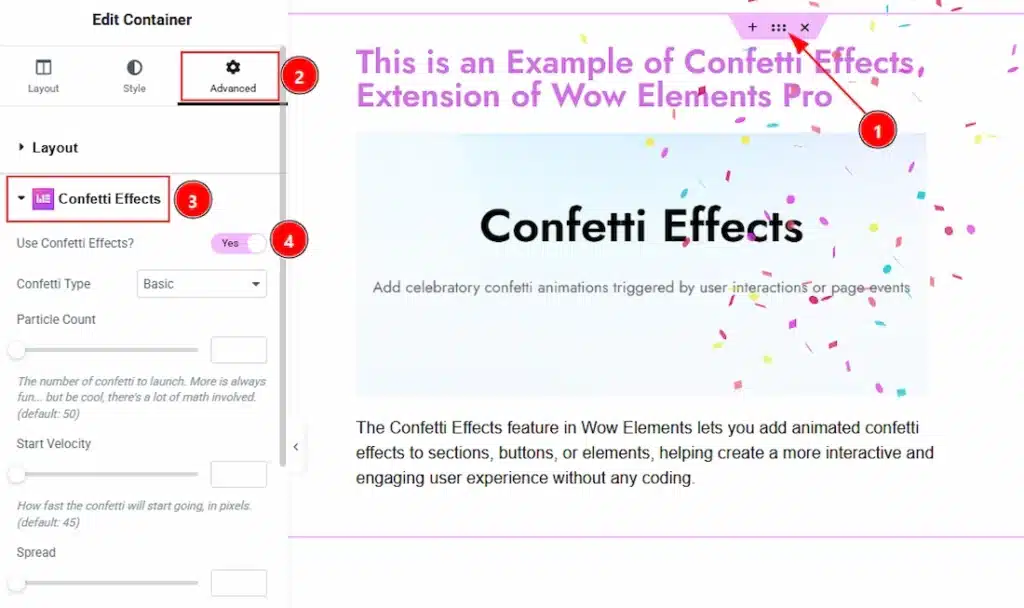
1. As we have choose to show the confetti on section so clicking on the section.
2. Now, go to Advanced Tab of the section.
3. Now, go to Confetti Effects option that placed in the Advanced Tab.
4. Enable the switcher of the Confetti Effects Effects.
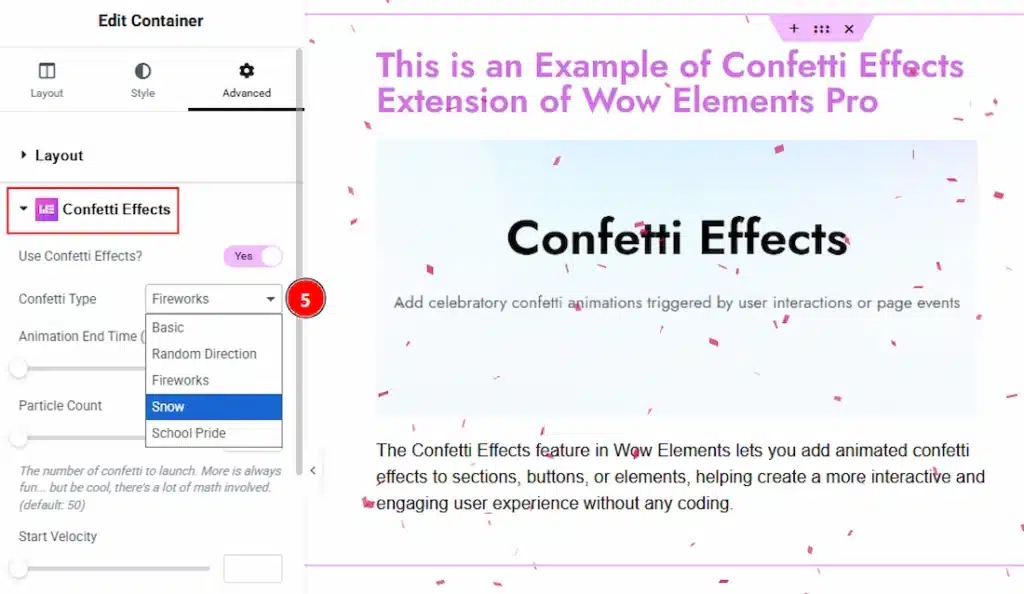
After enabling the confetti effects switcher button, you will get the following customization option-
1. Confetti Type: Here, you get the confetti type- Basic, Random Direction, Fireworks, Snow, and School Pride effects. Here we choose the basic one, and you can choose your preferred one from here.
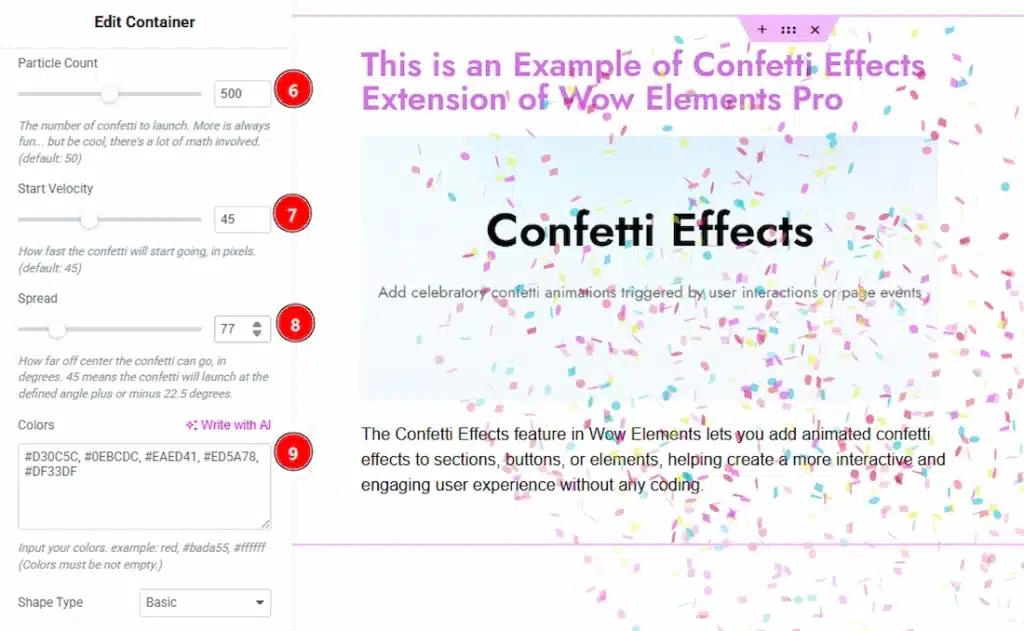
6. Particle Count: Controls how many confetti pieces are generated per effect. Higher values create a fuller animation but may impact performance.
7. Start Velocity: Defines the initial speed of the confetti particles. Higher values make the particles shoot out faster.
8. Spread: Adjusts the angle range of the confetti burst. Larger spread values create a wider, more dispersed effect.
9. Colors: Specifies the colors used for the confetti particles. Multiple colors can be added using hex codes to create a vibrant mix.
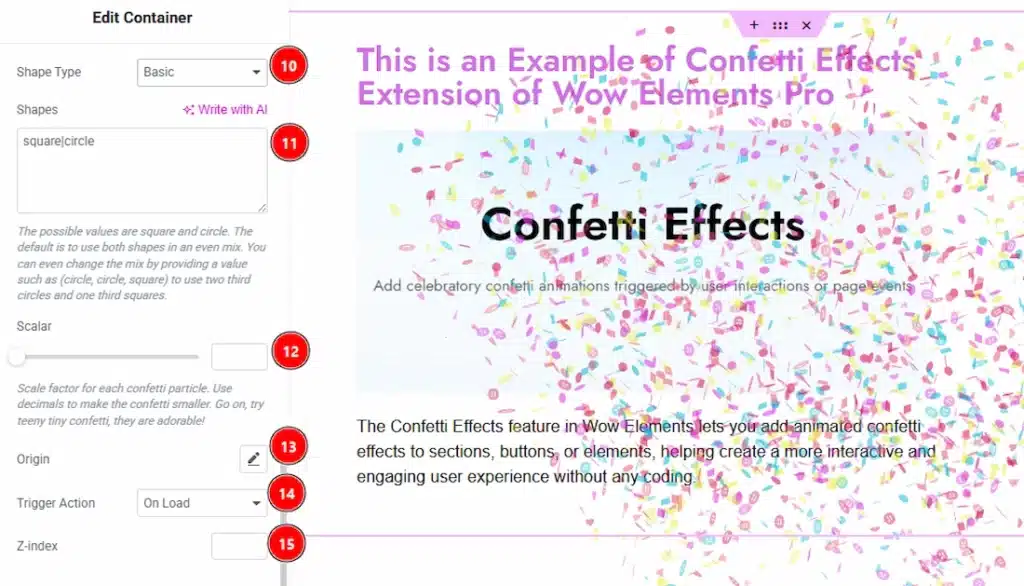
10. Shape Type: Here, you will get the shape type- Basic, Emoji, and SVG path. Select the style category of confetti shapes, and the selected types of shapes will apply to the confetti.
11. Shapes: Specifies the individual shapes used in the confetti effect (e.g., circle, square). Multiple values can be combined to create a mixed shape distribution.
12. Scalar: Controls the size scaling of each confetti particle. Lower values produce smaller particles, while higher values increase their size.
13. Origin: Defines the starting point from which the confetti is launched. Adjust this to control where the effect begins on the screen.
14. Trigger Action: You can select the trigger action type- On Load, On View, On Click, On Hover, Delay, and Ajax Success. Here, we select the on-hover trigger action to explore the feature.
15. Z-index: You can set the Z-index value from here. Higher values ensure the effect appears above other elements.
All done, you have successfully used the Confetti Effects feature on your website.
Video Assist #
You can watch this video to learn how to use the Confetti Effects Extension. Don’t forget to visit the demo page for more examples.
Thanks for staying with us.