


The Post Info widget from Wow Elements is designed to dynamically display important post metadata such as the author name, publication date, time, comments, categories, tags, and more within your website layouts. It is primarily used in the Theme Builder to create custom Single Post templates, allowing post information to be automatically pulled and displayed for each individual post. With flexible layout and styling controls, you can easily customize how post metadata appears to match your website’s design and improve content presentation. In this documentation, we will guide you through how to use and customize the Post Info widget in Wow Elements.
Enable the Post Info Widget #
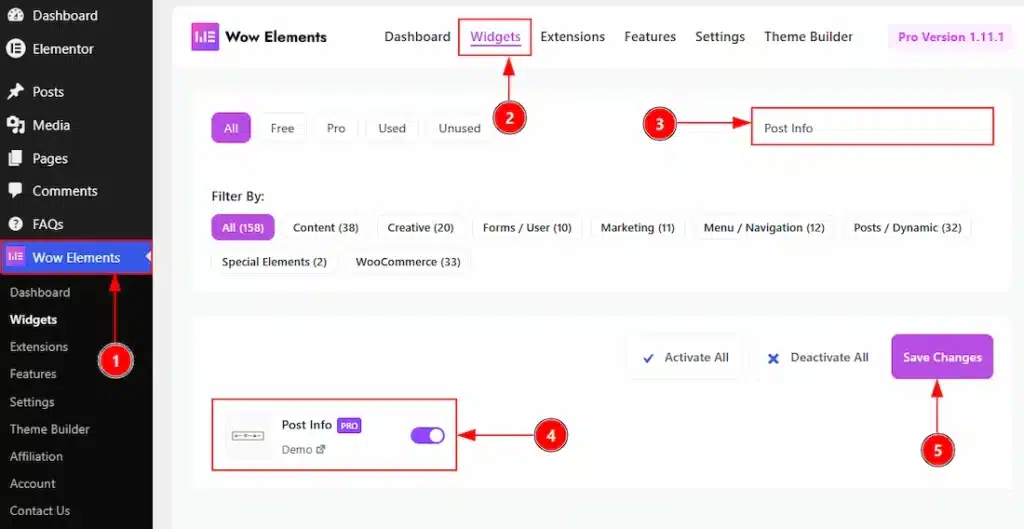
To use the Post Info by Wow Elements Pro, first, you have to enable the widget.
- Go to WordPress Dashboard → Wow Elements Pro Plugin dashboard.
- Then Click the Widgets Tab.
- Search the Post Info Widget Name.
- Enable the Post Info Widget.
- Hit the Save Settings Button.
Things That Must Need To Do Before Using The Widget #
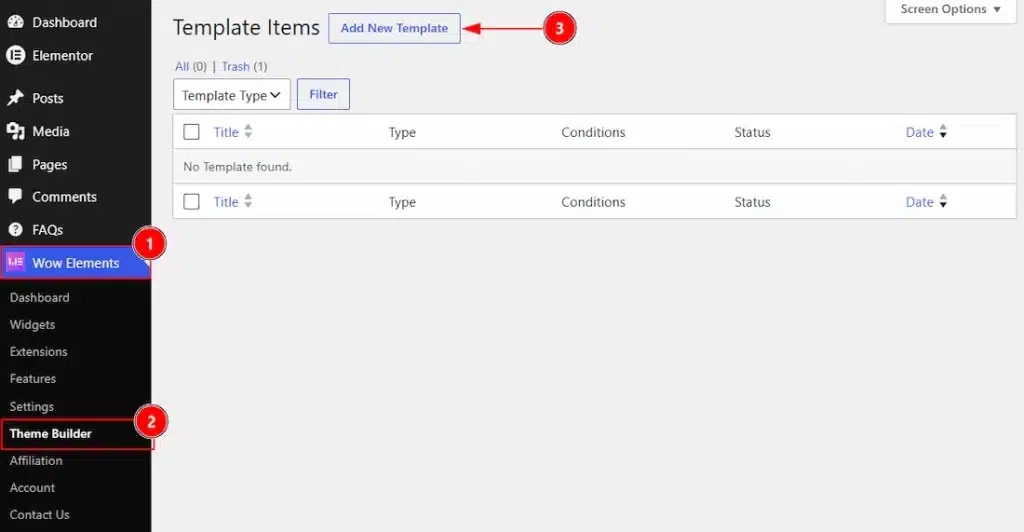
1. Go to WP Dashboard → Wow Elements.
2. Click on the Theme Builder Tab.
3. Now, click on the Add New Template to create new template.
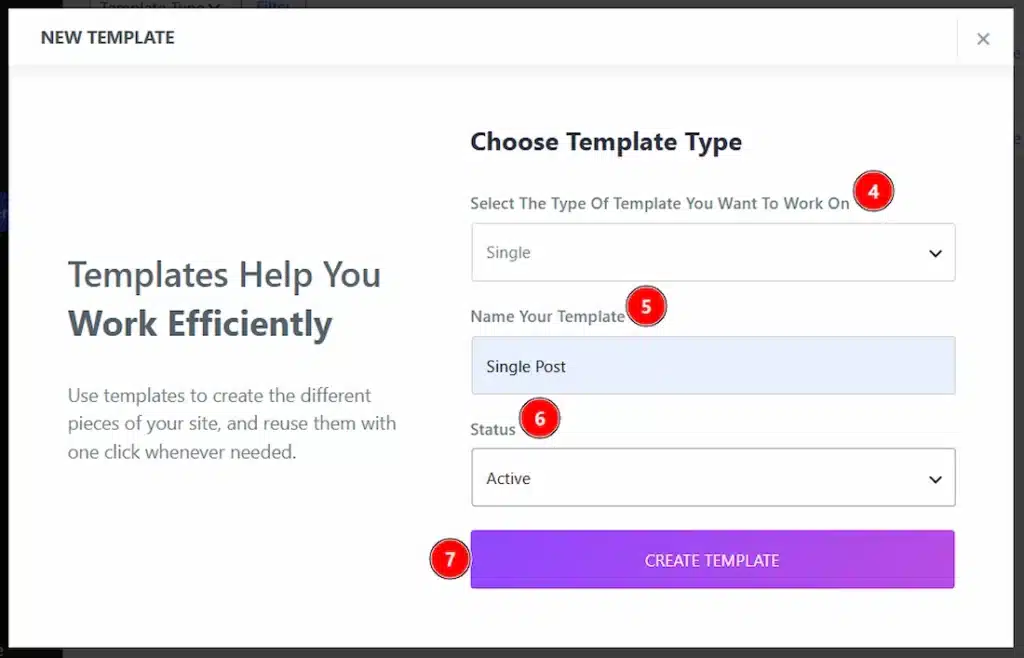
4. Here, in this field you have to select the type of template where you want to work. We have selected the Post Type Single category template.
5. You can set a name for your template in this field.
6. You can set the status of the template to active or inactive with this option.
7. You can click on the create template button to complete the creation and once it created it will automatically redirect your to the elementor editor to create your design.
Inserting the Post Info widget #
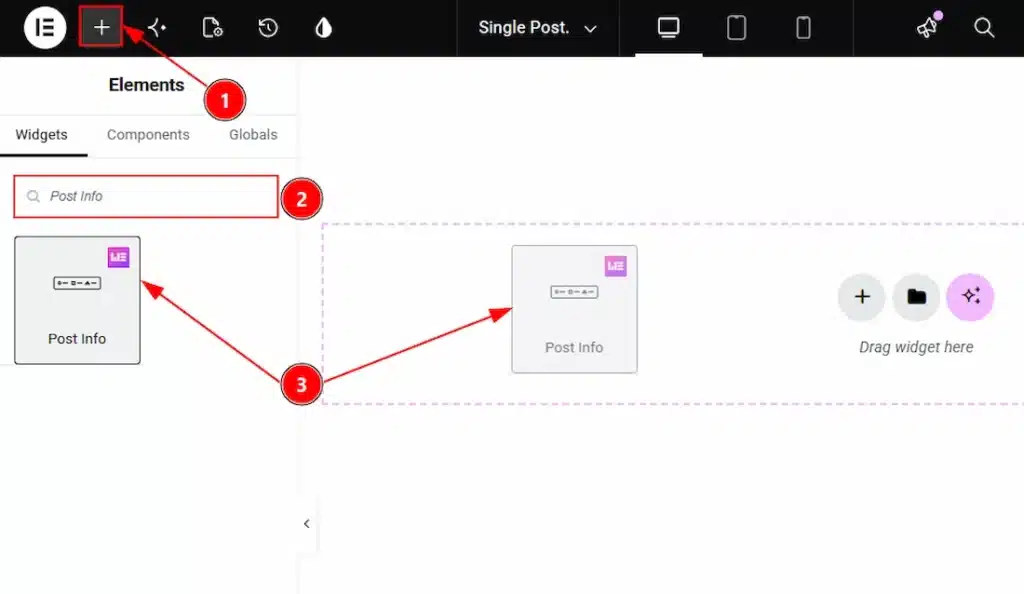
After the editor open within the theme builder, please do the followings to use the Post Info widget –
1. Hit the “+” icon Button.
2. Search the Post Info widget.
3. Drag the widget and drop it on the editor page
Content Tab Overview #
Meta Data Section #
Go to Content → Meta Data
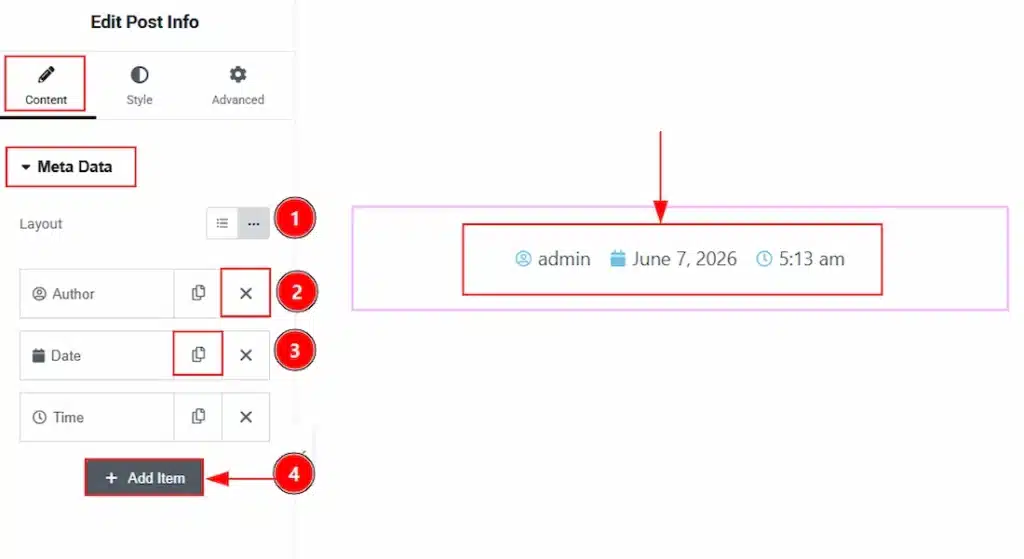
1. Layout: You can select the layout to appear the post info to your audience between the list or inline option. Here we have selected the layout as inline.
2. Close Button: You can click on this button to delete the item.
3. Copy Button: You can click on this button to duplicate the item.
4. Add Item: You can click on this button to add more item.
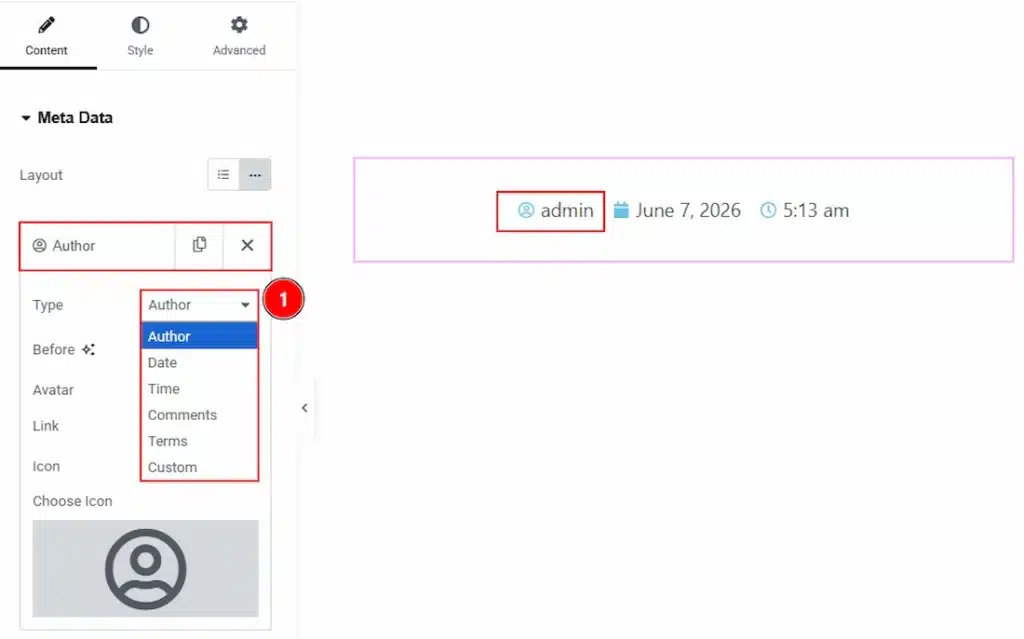
Now, let’s see the inner options of the item that we will get to customize –
1. Type: You can select the item type with this option. As per the selection of the type the below options will change to customize. The available types are Author, Date, Time, Comments, Terms & Custom. Here we have selected the type as Author.
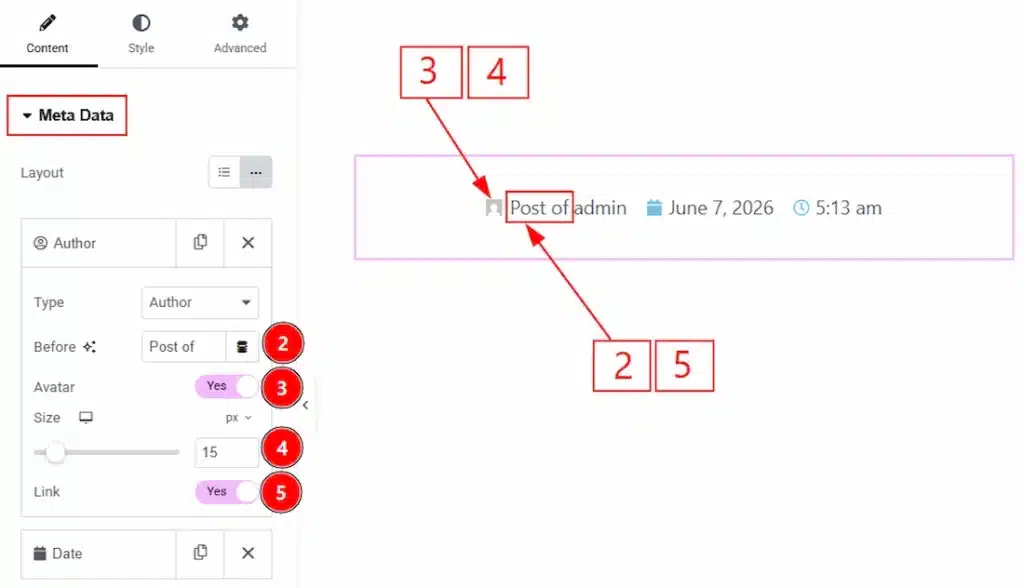
2. Before: You can add anything before the Author name using this option.
3. Avatar: Enable the switcher to show the author image to your audience.
4. Size: You can make changes to the avatar image size with this option.
5. Link: Enable the switcher to make the author field linkable with this option.
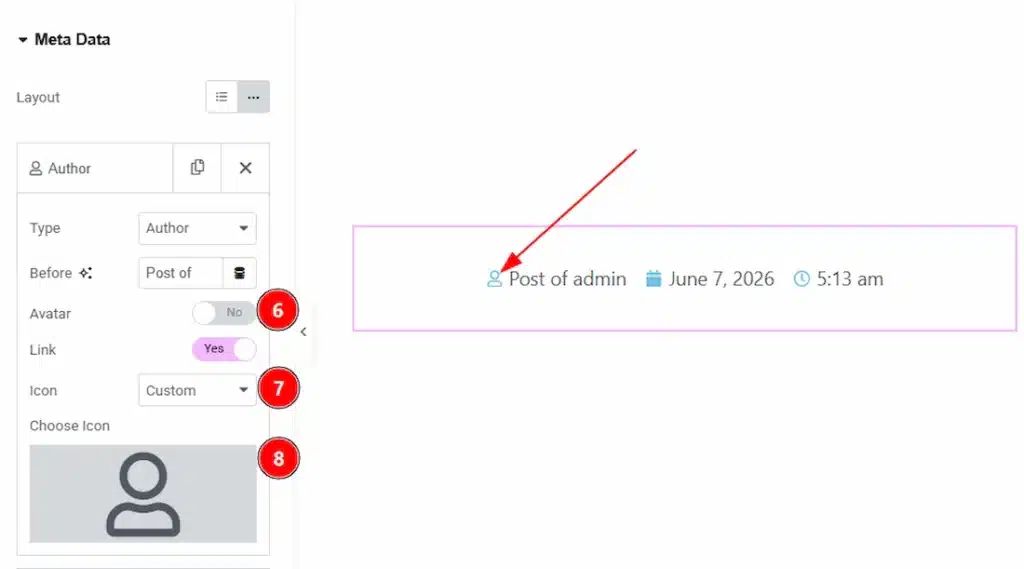
6. Avatar: You can keep the switcher disable to get the option to set up the icon for the avatar with this option.
7. Icon: You can select the icon style as default or custom with this option.
8. Choose Icon: If you have selected the icon as Custom than you can add and make changes to the icon as you prefer with this option.
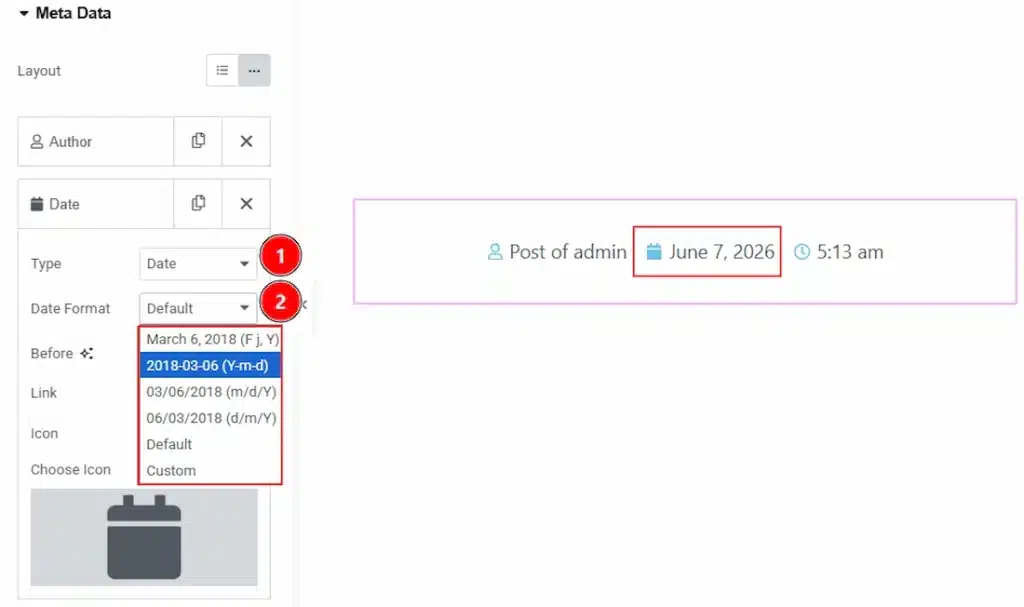
Now, let’s see what other options we have to customize when we select the type as Date.
1. Type: You can select the post info item type as date with this option.
2. Date Format: You can choose the date format that you want to show to your audience with this option.
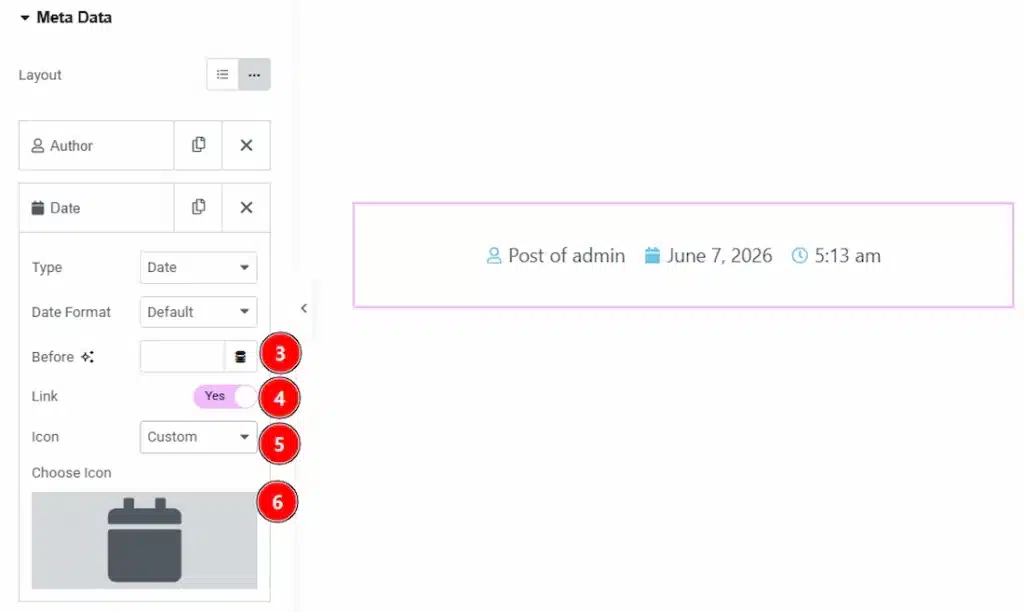
3. Before: You can add anything before the date field with this option.
4. Link: Enable the switcher to make the date linkable with this option.
5. Icon: You can select the icon type as Custom or Default with this option.
6. Choose Icon: You can add and make changes to the icon as you prefer with this option.
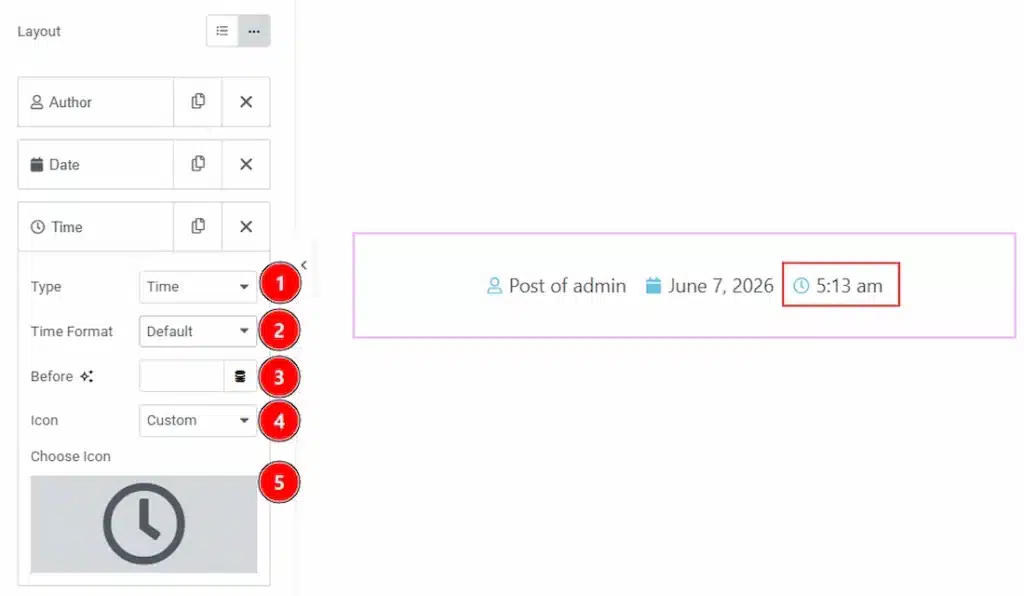
Now, let’s see what other options we have to customize when we select the type as Time.
1. Type: You can select the post info item type as time with this option.
2. Time Format: You can choose the time format that you want to show to your audience with this option.
3. Before: You can add anything before the time field with this option.
4. Icon: You can select the icon type as Custom or Default with this option.
5. Choose Icon: You can add and make changes to the icon as you prefer with this option.
Style Tab Overview #
List Section #
Go to Style → List
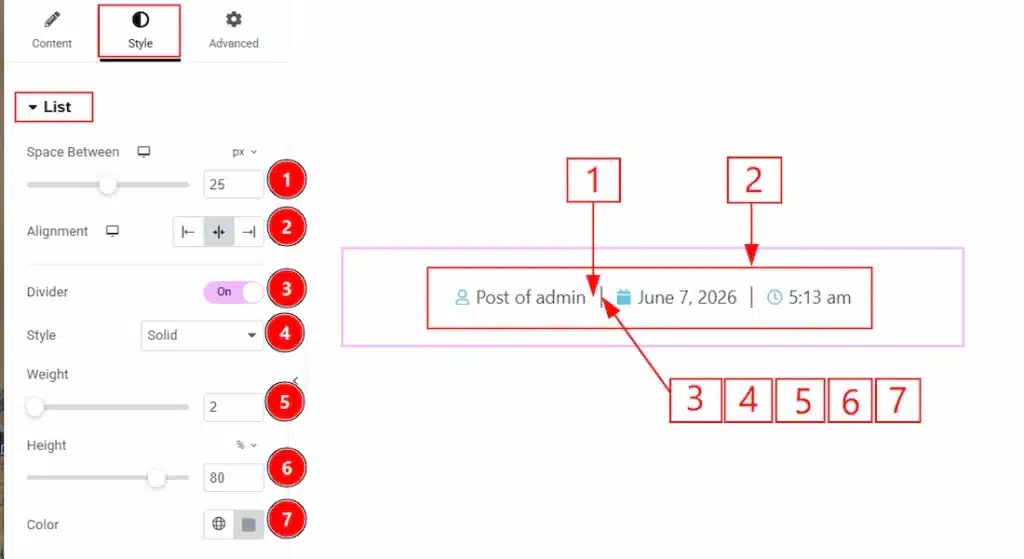
1. Space Between: You can adjust the space between the post info items with this option.
2. Alignment: You can set the position for the post info items to left, center or right with this option.
3. Divider: Enable the switcher to add divider between the post info items with this option.
4. Style: You can choose a style for the divider with this option.
5. Weight: You can adjust the weight of the divider with this option.
6. Height: You can adjust the height of the divider with this option.
7. Color: You can make changes to the divider color with this option.
Icon Section #
Go to Style → Icon
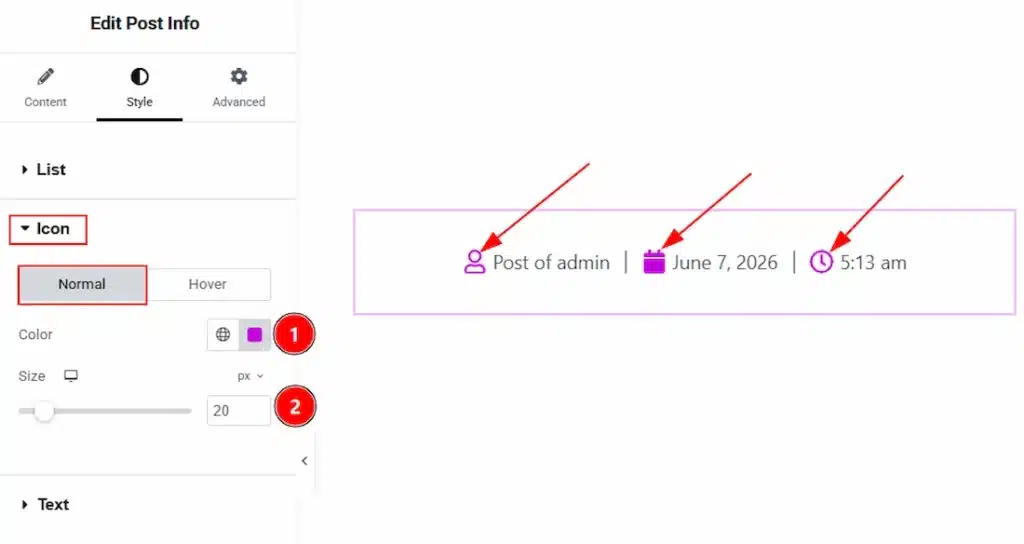
In this section, we have two more tabs. These are Normal & Hover. Let’s start with the Normal Tab first –
1. Color: You can make changes to the icon color with this option.
2. Size: You can adjust the icon size with this option.
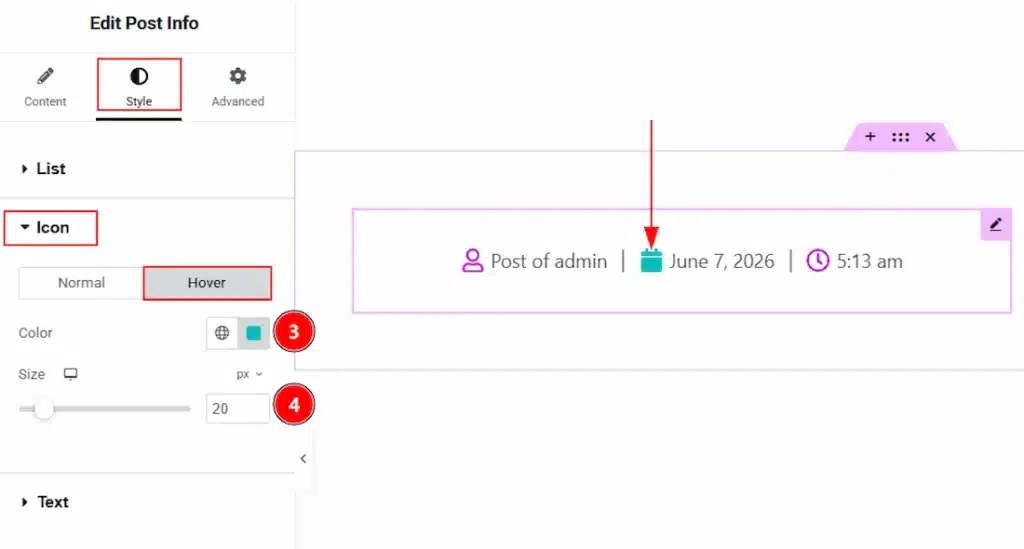
Now, let’s proceed to the Hover Tab –
3. Color: You can make changes to the icon hover color with this option.
4. Size: You can make changes to the icon hover size with this option.
Text Section #
Go to Style → Text
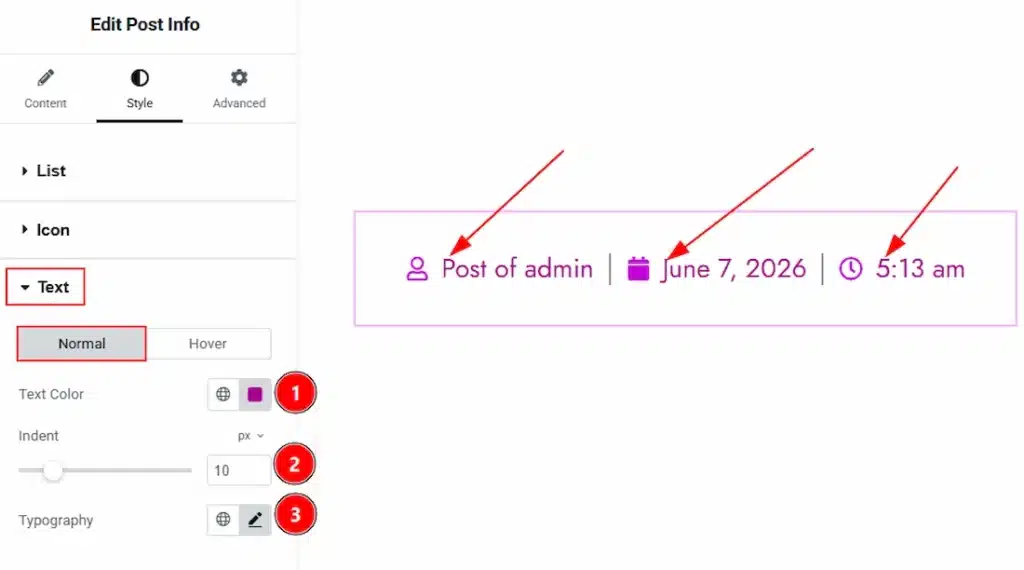
In this section, we have two more tabs. These are Normal & Hover. Let’s start with the Normal Tab first –
1. Text Color: You can make changes to the text color with this option.
2. Indent: You can adjust the space between the text and the icon with this option.
3. Typography: Change the font family, size, weight, transform, style, decoration, line height, letter spacing, and word spacing from here.
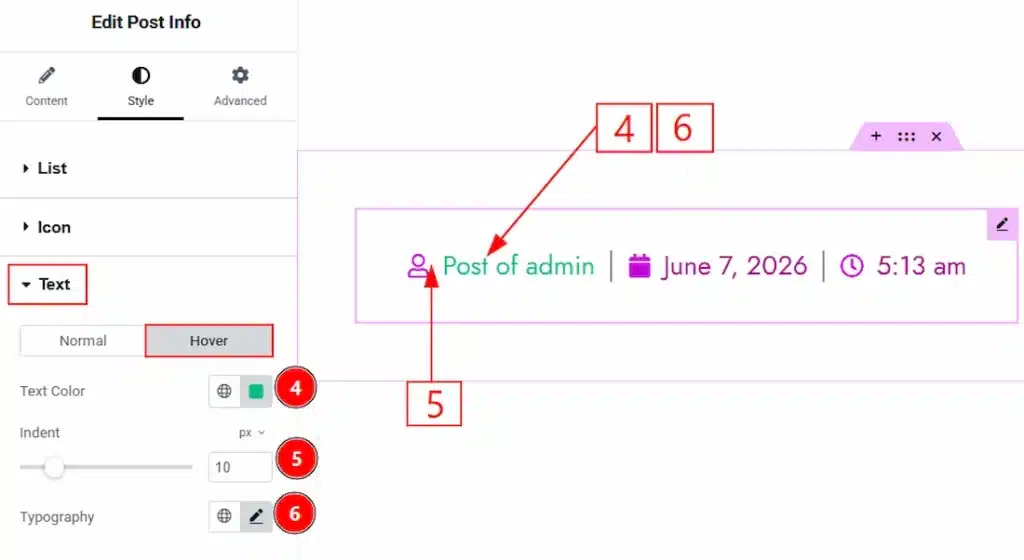
Now, let’s proceed to the Hover tab –
4. Text Color: You can make changes to the text hover color with this option.
5. Indent: You can adjust the space between the text & icon while hovering with this option.
6. Typography: Change the font family, size, weight, transform, style, decoration, line height, letter spacing, and word spacing from here.
All done! You have successfully customized the Post Info widget on your website.
Video Assist #
You can also watch the video tutorial to learn more about the Post Info Widget. Please visit the demo page for examples.
Thanks for being with us.