



The Ripple Effects extension in Wow Elements allows you to add smooth and interactive ripple animations to your website images, buttons and elements without any coding. It helps create engaging visual experiences by generating wave-like ripple effects on buttons, images, or widgets during user interaction. With flexible customization controls and modern animation styles, you can easily enhance the visual appeal and interactivity of your Elementor website. In this documentation, we will guide you through how to use and customize the Ripple Effects extension in Wow Elements.
Enabling the Ripple Effects Extension #
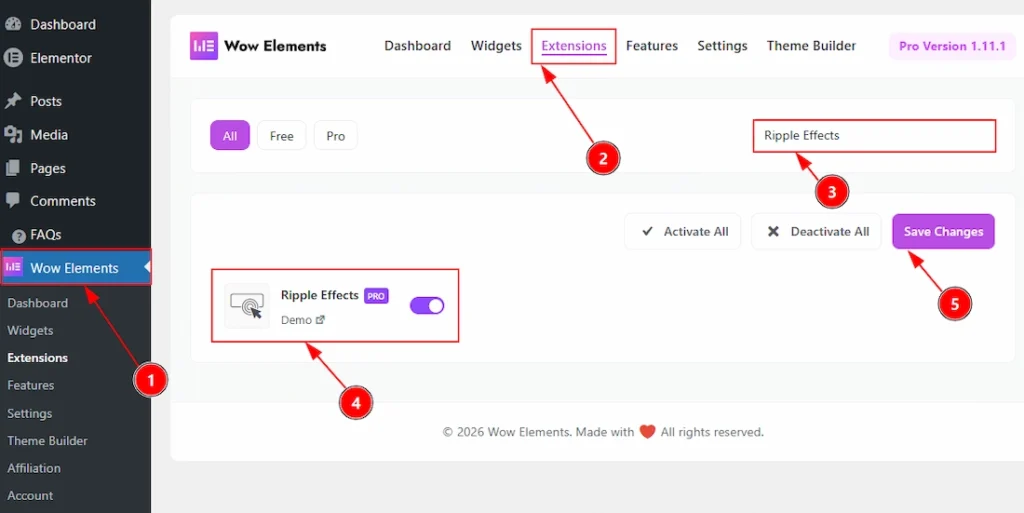
To use the Ripple Effects Extension from Wow Elements Pro, first, you have to enable the extension.
- Go to WordPress dashboard → Wow Elements Plugin dashboard.
- Then, Click the Extension Tab.
- Search the Ripple Effects Extension Name.
- Enable the Ripple Effects Extension.
- Hit the Save Settings Button
Where To Find The Ripple Effects Extension #
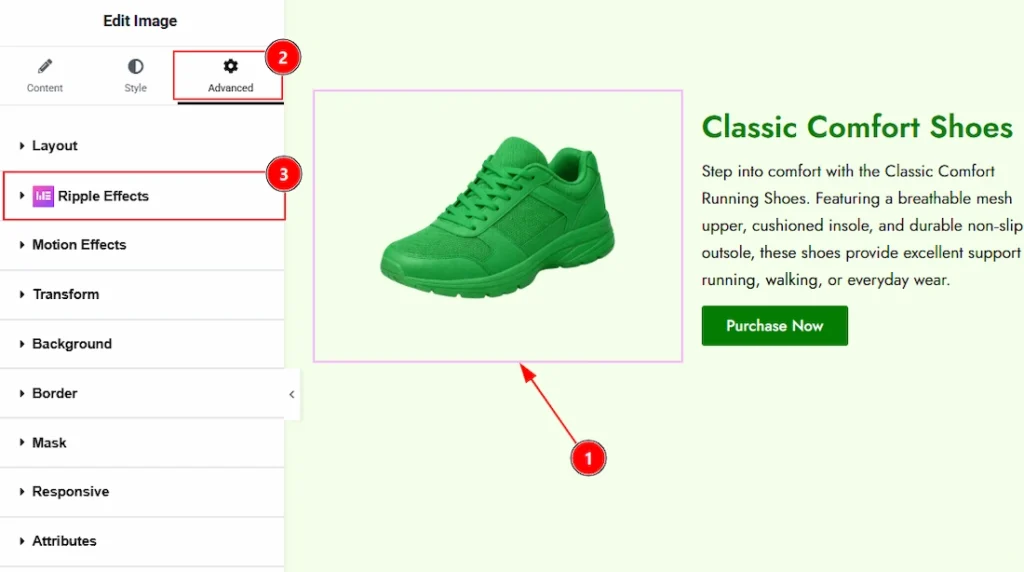
To find the Ripple Effects Extension, you must need to select the element where you want to use the extension. Let’s see the steps below –
1. Click to any elements which you want to configure by the Ripple Effects extension.
2. Now move to the Advanced tab.
3. You will find the Ripple Effects extension here along with the Wow Elements logo.
Please note that this extension does not function inside Elementor Editor Mode. To see the final result properly, you need to preview the page on the frontend.
Configuring the Ripple Effects Extension #
In this part, we will configure both image & button with the Ripple Effects Extension. Let’s see how the Ripple Effects Extension works on both Image & Button.
Ripple Effects Extension On Image #
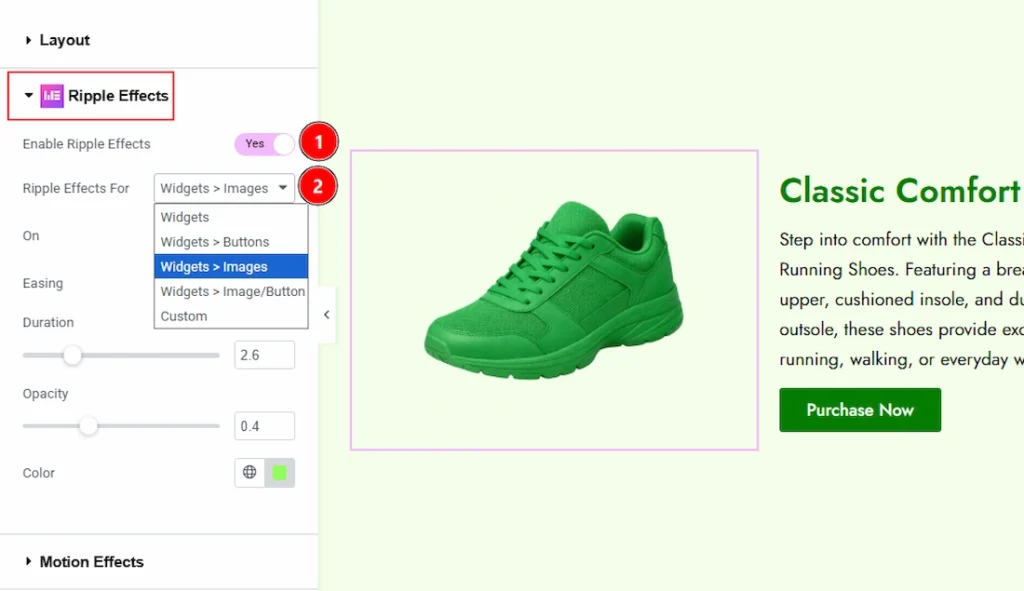
1. Enable Ripple Effects: Enable the switcher to turn on and get options to customize the Ripple Effects extension.
2. Ripple Effects For: You can set for which you are using the Ripple Effects here. The available options are widgets, widget>buttons, widgets>images, widgets>image/button & custom. Choose one that match your need.
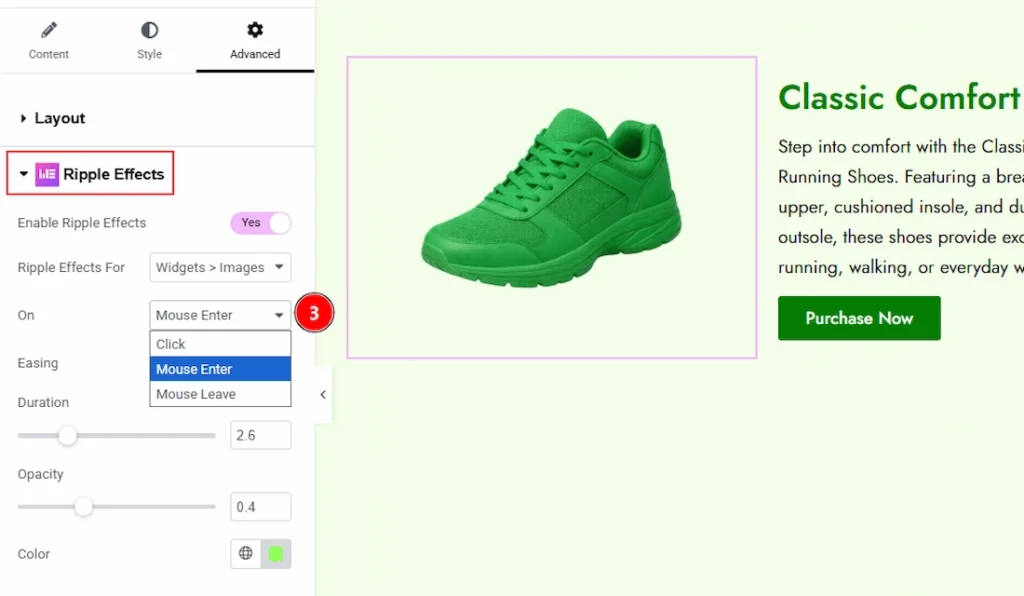
3. On: You can choose the trigger point of ripple effect in this field. You can choose between click, mouse enter and mouse out.
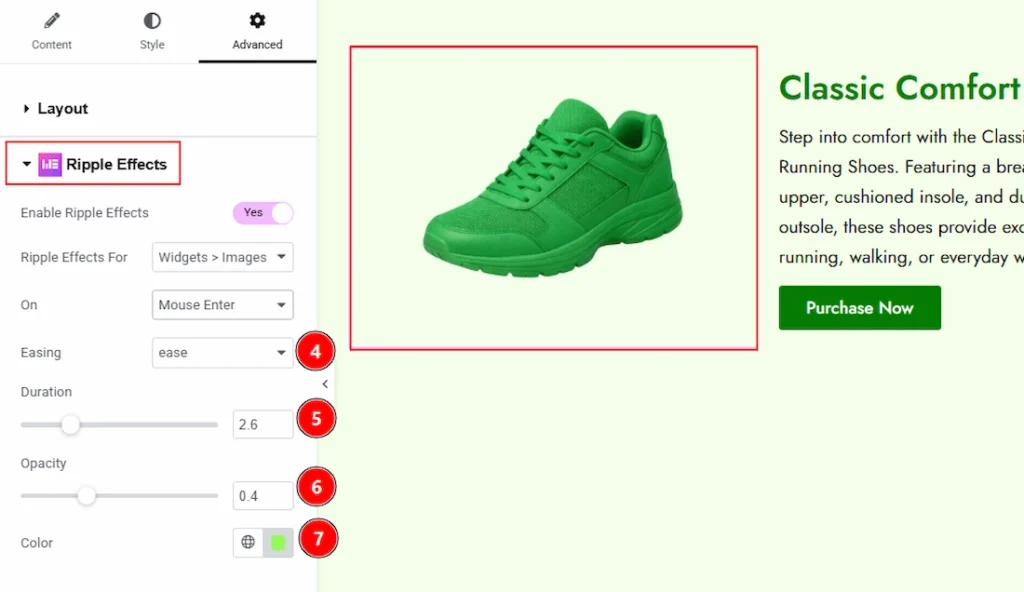
4. Easing: You can select the ripple effect animation type with this option.
5. Duration: You can set the animation running time with this option.
6. Opacity: You can adjust the bluriness of the ripple effects with this option.
7. Color: You can change the color which will show when animating the ripple with this option.
Preview of Ripple Effect on Image #

As we have set the on as Mouse Enter so when & from which side the mouse will enter to the element, the ripple effect will be shown.
Ripple Effects Extension On Button #
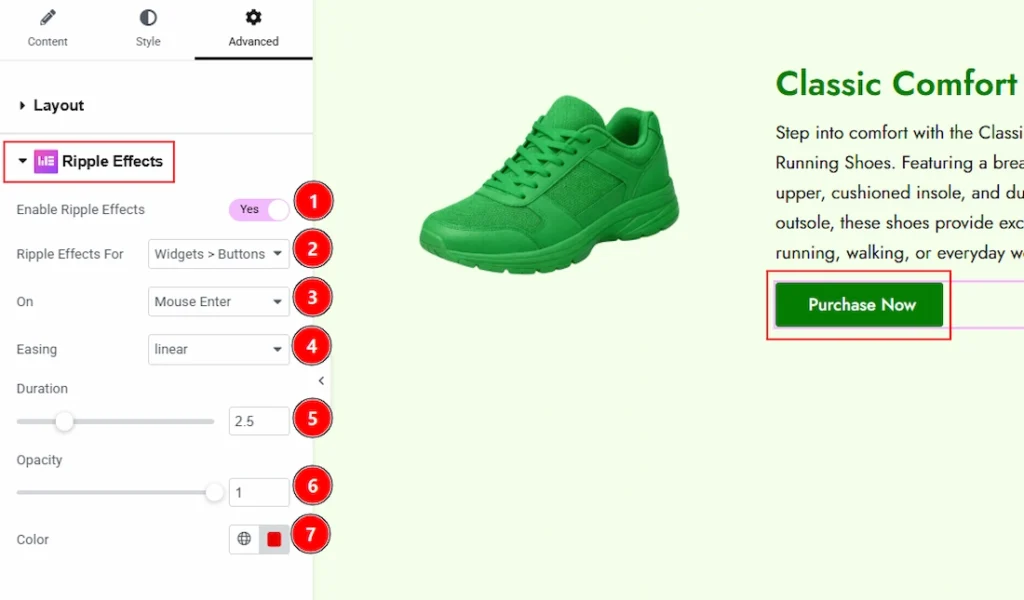
1. Enable Ripple Effects: Enable the switcher to turn on and get options to customize the Ripple Effects extension.
2. Ripple Effects For: You can set for which you are using the Ripple Effects here. The available options are widgets, widget>buttons, widgets>images, widgets>image/button & custom. Choose one that match your need.
3. On: You can choose the trigger point of ripple effect in this field. You can choose between click, mouse enter and mouse out.
4. Easing: You can select the ripple effect animation type with this option.
5. Duration: You can set the animation running time with this option.
6. Opacity: You can adjust the bluriness of the ripple effects with this option.
7. Color: You can change the color which will show when animating the ripple with this option.
Preview of Ripple Effect on Button #

As we have set the on as Mouse Enter so when & from which side the mouse will enter to the element, the ripple effect will be shown.
All done, You have successfully customised the Ripple Effects Extension on your website element.
Video Assist #
You can also watch the tutorial video about the Rippe Effects Extension. Please visit the demo page for examples.
Thanks for staying with us.