


The Additional Information widget from Wow Elements Pro is designed to dynamically display the additional product details and attributes of the current WooCommerce product within your website layouts. It is primarily used in the Theme Builder to create custom Single Product templates, allowing product specifications, attributes, and other supplementary information to be automatically pulled and displayed for each individual product. With flexible styling and layout controls, you can easily customize the appearance of the additional information section to match your store’s branding and enhance the customer shopping experience. In this documentation, we will guide you through how to use and customize the Additional Information widget in Wow Elements Pro.
Enable the Additional Information Widget #
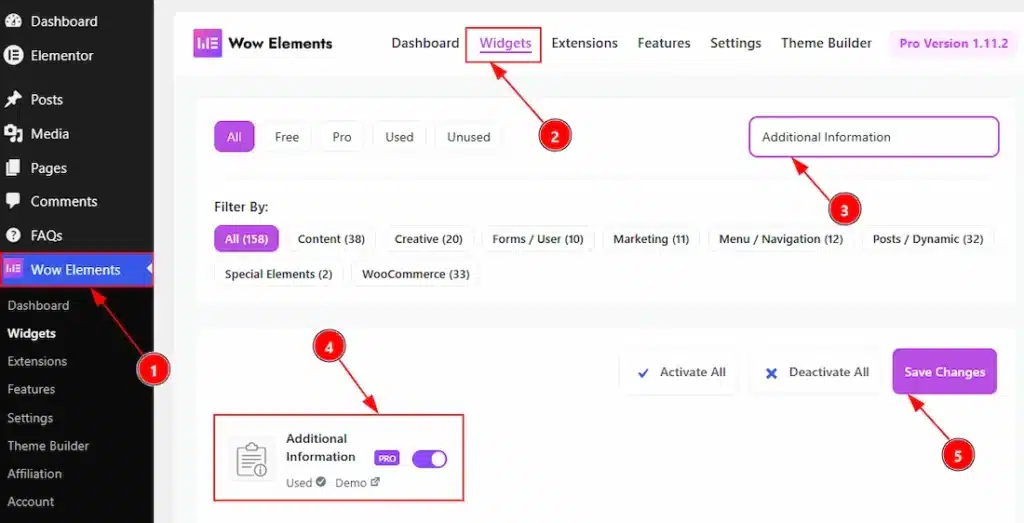
To use the Additional Information by Wow Elements Pro, first, you have to enable the widget.
- Go to WordPress Dashboard → Wow Elements Pro Plugin dashboard.
- Then Click the Widgets Tab.
- Search the Additional Information Widget Name.
- Enable the Additional Information Widget.
- Hit the Save Settings Button.
Note: You must need to download the WooCommerce plugin first and activate the plugin to get the option to enable the widget.
Things That Must Need To Do Before Using The Widget #
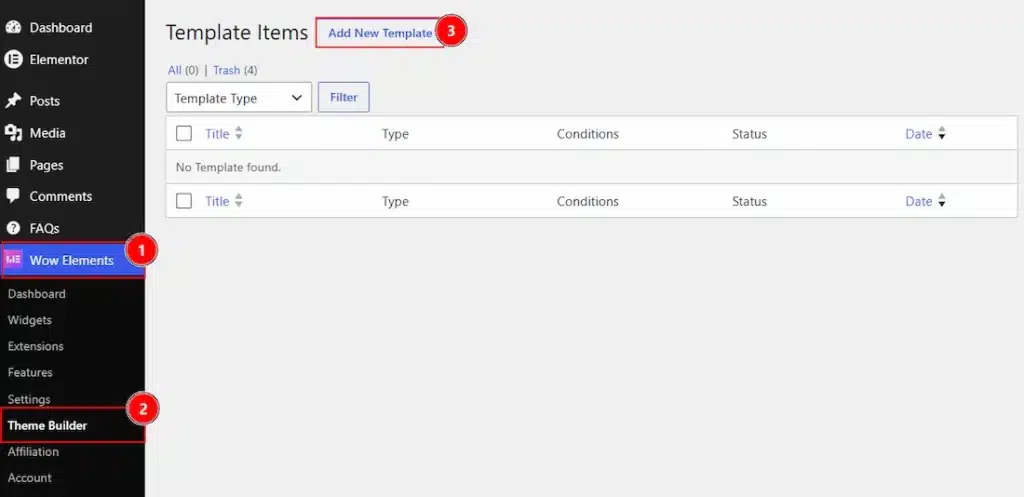
1. Go to WP Dashboard → Wow Elements.
2. Click on the Theme Builder Tab.
3. Now, click on the Add New Template to create new template.
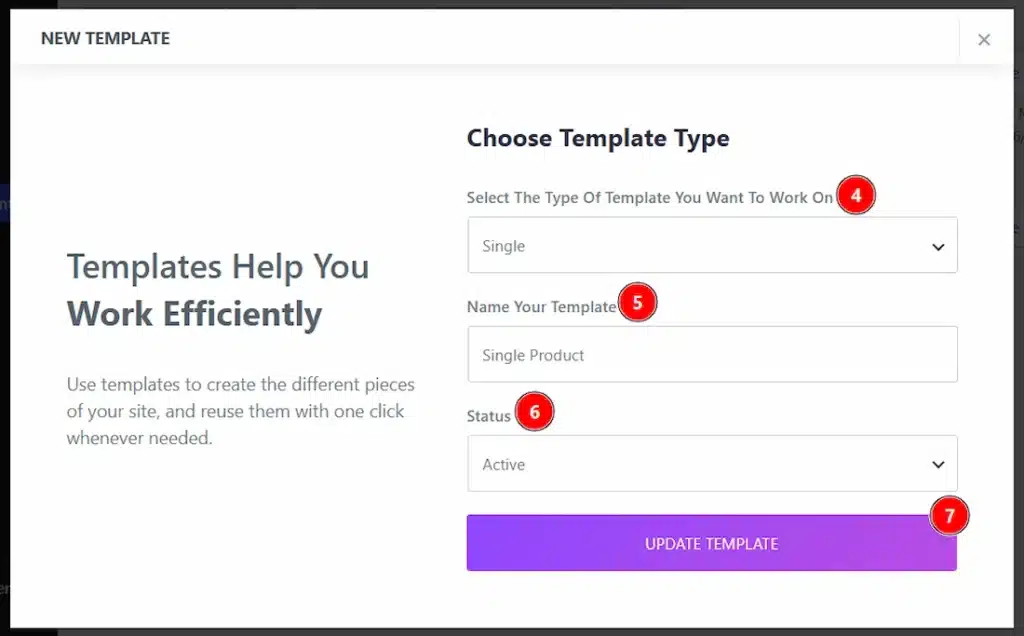
4. Here, in this field you have to select the type of template where you want to work. We have selected the Product Type Single category template.
5. You can set a name for your template in this field.
6. You can set the status of the template to active or inactive with this option.
7. You can click on the create template button to complete the creation and once it created it will automatically redirect your to the elementor editor to create your design.
Note: You must have to activate the WooCommerce plugin and also you must have some active products.
Inserting the Additional Information widget #
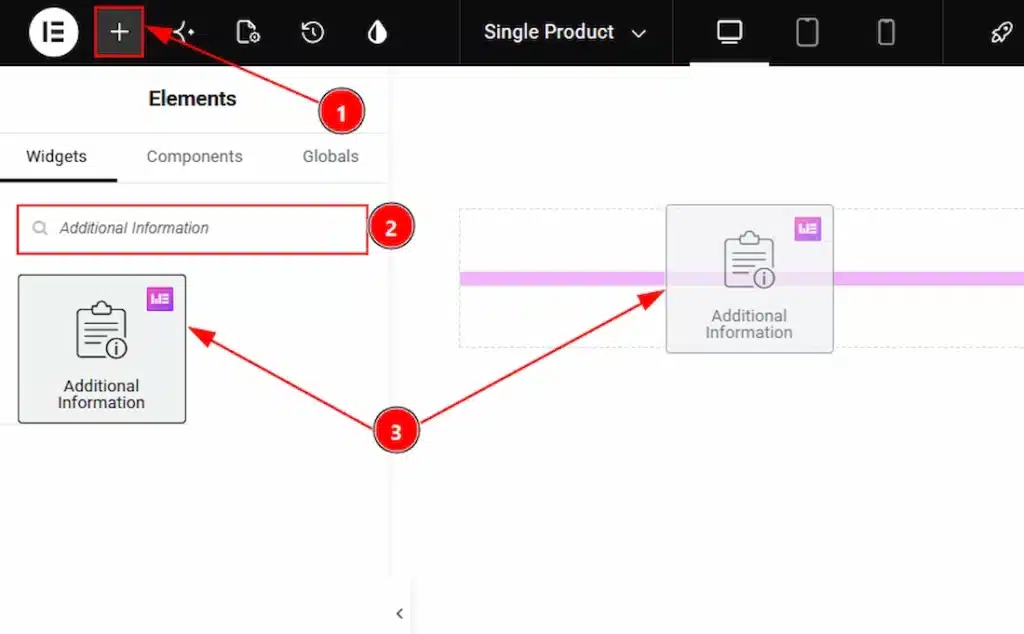
After the editor open within the theme builder, please do the followings to use the Additional Information widget –
1. Hit the “+” icon Button.
2. Search the Additional Information widget.
3. Drag the widget and drop it on the editor page
Style Tab Overview #
Layout Section #
Go to Style → Layout
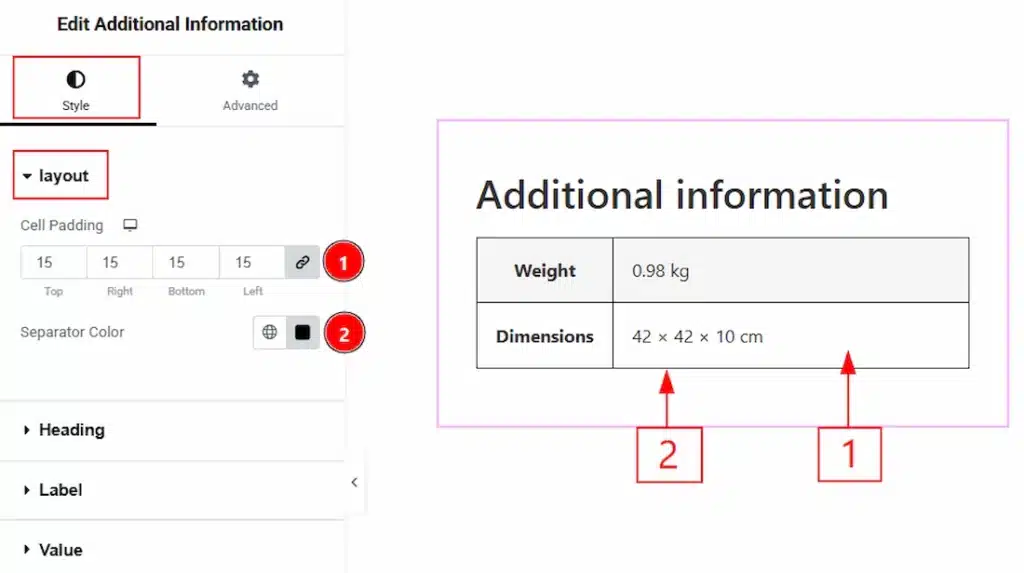
1. Cell Padding: You can adjust the space inside the cells with this option.
2. Separator Color: You can apply and make changes to the separator color with this option.
Heading Section #
Go to Style → Heading
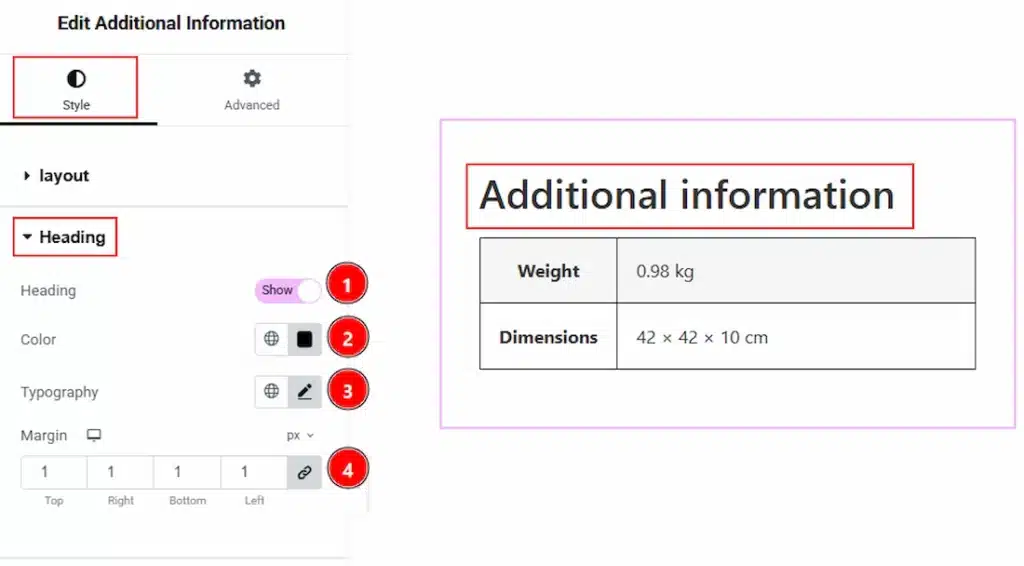
1. Heading: Enable the switcher to show the Heading to your audience with this option.
2. Color: You can apply and make changes to the heading text color with this option.
3. Typography: Change the font family, size, weight, transform, style, decoration, line height, letter spacing, and word spacing from here.
4. Margin: You can adjust the space around the heading field with this option.
Label Section #
Go to Style → Label
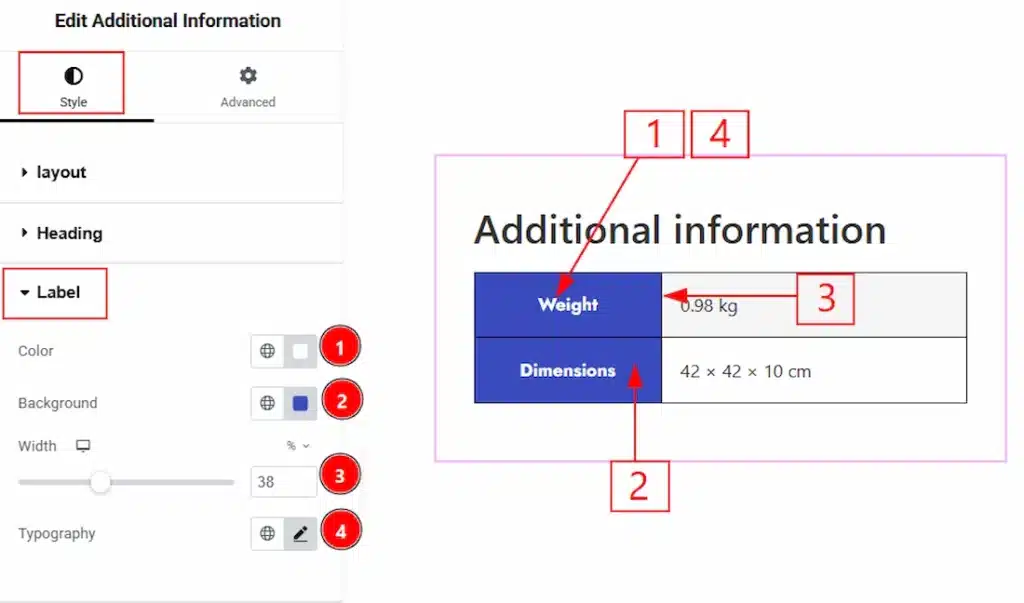
1. Color: You can apply and make changes to the label text color with this option.
2. Background: You can make changes to the background color with this option.
3. Width: You can adjust the width of the label field with this option.
4. Typography: Change the font family, size, weight, transform, style, decoration, line height, letter spacing, and word spacing from here.
Value Section #
Go to Style → Value
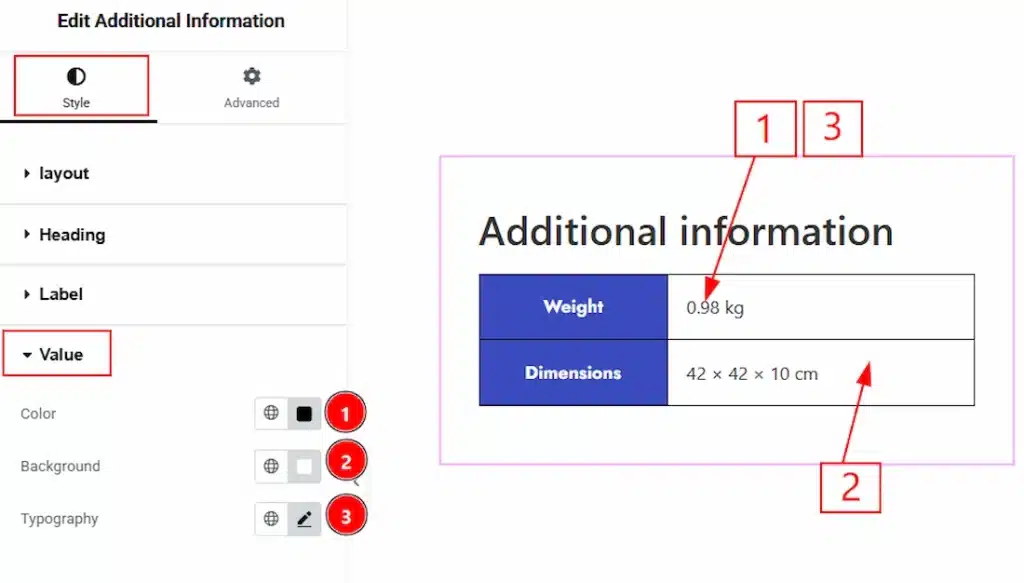
1. Color: You can make changes to the value text’s color with this option.
2. Background: You can apply and make changes to the value field’s background color with this option.
3. Typography: Change the font family, size, weight, transform, style, decoration, line height, letter spacing, and word spacing from here.
All done! You have successfully customized the Additional Information widget on your website.
Video Assist #
You can also watch the video tutorial to learn more about the Additional Information Widget. Please visit the demo page for examples.
Thanks for being with us.